***
title: VoxEngine CI
subtitle: Learn how to manage Voximplant applications, rules, and scenarios from your own environment using VoxEngine CI.
---------------------
For a complete documentation index, fetch https://docs.voximplant.ai/llms.txt
Learn how to manage Voximplant applications, rules, and scenarios from your own environment using [@voximplant/apiclient-nodejs](https://www.npmjs.com/package/@voximplant/apiclient-nodejs) under the hood.
With Voxengine CI you can use a preferred IDE to write source code of Voximplant call scenarios (we provide type definitions for your convenience) as well as integrate application deployment into the CI/CD toolkit that is used in your environment.
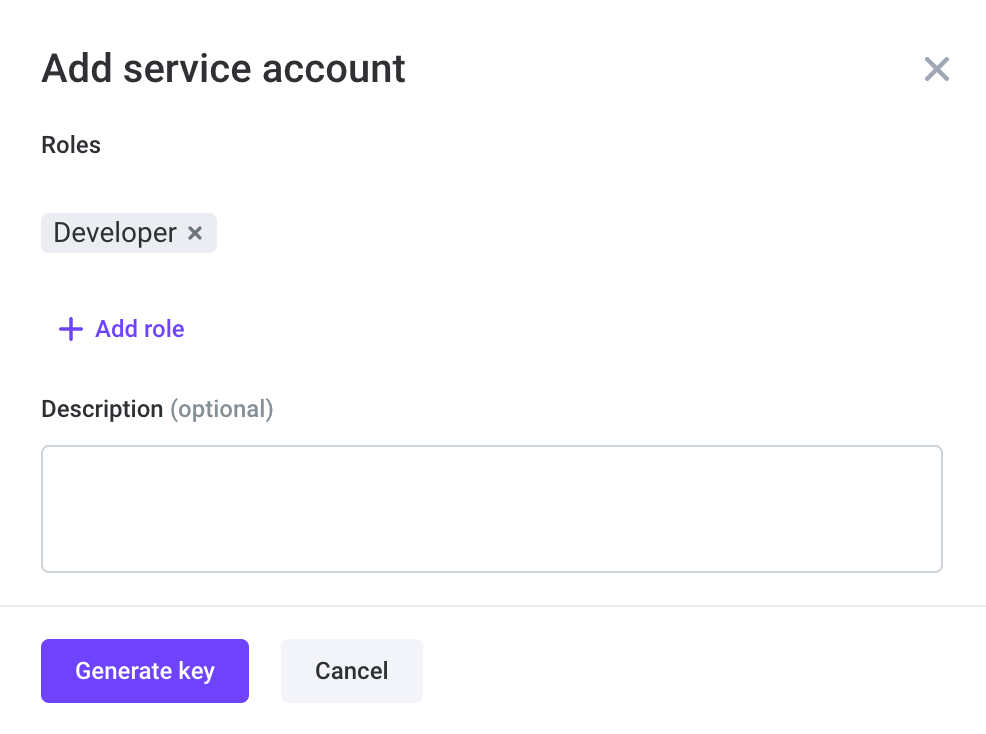
## Create a service account
To work with Voxengine CI, you need a JSON file with your credentials. Go to the [Service accounts](https://manage.voximplant.com/settings/service_accounts) section of the control panel and generate the file there.
If the file with credentials already exists on your computer, you can use it instead of creating a new one. Learn more in the [API keys and Service accounts](https://voximplant.com/docs/howtos/integration/httpapi/auth) article.
## Configure CI
1. To install Voxengine CI, run the following command from your project folder (create the project first if you do not have it yet) in the Terminal:
```bash
npm i @voximplant/voxengine-ci
```
2. Create a .env file in the project root directory and add environment-specific variables to specify the name and location of the JSON file with your account credentials and the folder with files downloaded from your account:
```bash
VOX_CI_CREDENTIALS=/path/to/the/vox_ci_credentials.json
VOX_CI_ROOT_PATH=/path/to/the/voxengine_ci_source_files_directory
```
Creating a .env file is not necessary if you move the file with credentials to your project folder and it has a default name – **vox\_ci\_credentials.json**. The folder with the source files in this case will be created after initialization in your project folder as well and will be named **voxfiles**.
3. Initialize the project by running:
```bash
npx voxengine-ci init
```
This command downloads all files and metadata from your VoxImplant account. When all the files are downloaded, you can modify them and upload them back to the platform.
## Built-in type declarations
If you have a `voxengine-ci` npm package installed, you can use the **built-in type declarations** to work in your preferred IDE.
Type declarations allow developers to use an autocompletion, inline documentation and type checking in compile time.
Each version of the npm package contains the changes, that can be tracked, that is why we recommend using this approach instead of the [CDN type declarations](/platform/voxengine/type-declarations), which always contains the latest changes without using versioning.
To enable type declarations, add a `tsconfig.json` file to your project's root directory and specify the options as it is shown in the example below:
```json
{
"compilerOptions": {
"lib": [
"ES2020"
]
},
"include": [
"voxfiles/scenarios/src",
"node_modules/@voximplant/voxengine-ci/typings"
]
}
```
## Create apps, scenarios, and rules with CI
While using Voxengine CI, it is suggested that you do not rename or delete existing apps, scenarios, and rules, only create new ones, otherwise consistency will be affected. If you still need to rename or delete something, do it from the platform. But it is necessary to run `npx voxengine-ci init --force` after that to make your local and remote (platform) versions consistent.
### Applications
Create an **application.config.json** file in the **/path/to/the/voxengine\_ci\_source\_files\_directory/applications/your-application-name.your-account-name.voximplant.com/** directory (account name is your username), where **/path/to/the/voxengine\_ci\_source\_files\_directory** is created with the npx voxengine-ci init command. *This is the default voxfiles folder or the path you specified in the VOX\_CI\_ROOT\_PATH env variable.*
Then, add the following config to the **application.config.json** file:
```json
{
"applicationName": "your-application-name.your-account-name.voximplant.com"
}
```

### Rules and scenarios
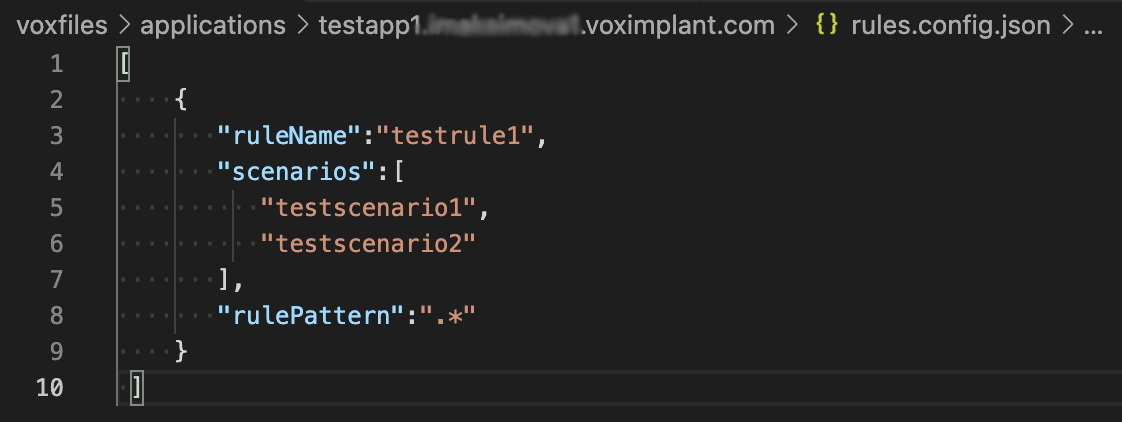
In the same directory, create a **rules.config.json** file with this config:
```json
[
{
"ruleName":"first-rule",
"scenarios":[
"first-scenario"
],
"rulePattern":"string-with-regexp"
},
{
"ruleName":"second-rule",
"scenarios":[
"second-scenario"
],
"rulePattern":"string-with-regexp"
}
]
```
Where **first-rule** and **second-rule** are the names of your [rules](/platform/voxengine/routing-rules); **first-scenario** and **second-scenario** are the names of your [scenarios](/platform/voxengine/scenarios); and **string-with-regexp** is a regular expression to validate caller IDs in incoming calls (".\*" by default).
It is not necessary to create two rules and two scenarios. Create as many of them as you need. Note that when you create a scenario, it becomes shared, so you will be able to access it from any application. Even if you delete all apps and all rules, the shared scenarios remain intact.
The order of the scenarios attached to one rule in this file defines the order of their execution. Keep this in mind when writing the scenario code.
Here is an example of such a file:
If your application does not have any rules yet, leave the JSON file empty {}.
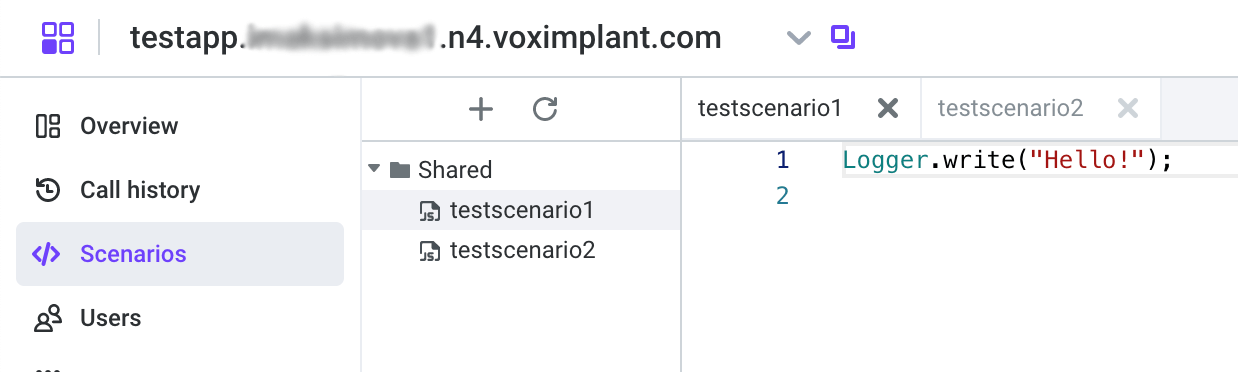
You can modify existing scenarios and create new ones ONLY in the **/voxfiles/scenarios/src** directory. Only the scenarios with their names specified in **rules.config.json** will be uploaded to the platform. The scenario file names should match the \*.voxengine.\{js,ts} pattern.
In our case, the scenario names should be as follows: **testscenario1.voxengine.js**, **testscenario2.voxengine.js**. These are the files where you write the scenario code.
We support both JavaScript and TypeScript scenarios. The compiler takes .ts and .js files, translates them into js files in the dist folder, and uploads these distributives to the platform. In this case, .ts files will be checked by the compiler for validity, and js files will be uploaded "as is". All the scenarios will have a .js extension after being uploaded to the platform, so you need to change the file extension back yourself.
When everything is ready, run
```bash
npx voxengine-ci upload --application-name your-application-name
```
to upload a new application with all rules and scenarios to the platform.
Use the `--dry-run` flag in this command to build the project locally without uploading changes to the platform. Find more information in the Usage examples section of this article.
Now you can find the newly created applications, rules, and scenarios on the platform:
## Modify scenarios and rules with CI
When an application is uploaded to the platform, you can add/modify rules (configure them in **rules.config.json**) and scenarios (in **/voxfiles/scenarios/src**) and run the
```bash
npx voxengine-ci upload --application-name your-application-name
```
command again to upload the changes.
If you specify a rule name or rule ID in the command, only the scenarios attached to this rule will be uploaded to the platform:
```bash
npx voxengine-ci upload --application-name your-application-name --rule-name your-rule-name
```
It works either when you upload a new rule or when you modify an existing one.
If you modify an existing application or existing rule, you can specify `--application-id` and `--rule-id` instead of `--application-name` and `--rule-name`, but if both are specified only the ID will be taken into account:
```bash
npx voxengine-ci upload --application-id your-application-id --rule-id your-rule-id
```
Do not forget about the `--dry-run` flag if you want to test your changes before uploading them to the platform.
## Usage examples
`--application-id` and `--rule-id` flags can be used instead of `--application-name` and `--rule-name` for the npx voxengine-ci scenarios command when you modify an existing application and rules. If both are specified only the ID will be taken into account.
**Initialize the project**
```bash
npx voxengine-ci init
```
**Initialize the project from scratch, deleting all existing files and configurations**
```bash
npx voxengine-ci init --force
```
**Build application scenarios (by specifying application-name/application-id) for ALL application rules without uploading them to the platform**
```bash
npx voxengine-ci upload --application-name your_application_name --dry-run
```
**Build application scenarios (by specifying application-name/application-id and rule-name/rule-id) for a specified application rule without uploading them to the platform**
```bash
npx voxengine-ci upload --application-name your_application_name --rule-name your_rule_name --dry-run
```
**Build and upload application scenarios (by specifying application-name/application-id) for ALL application rules**
```bash
npx voxengine-ci upload --application-name your_application_name
```
**Build and upload application scenarios (by specifying application-name/application-id and rule-name/rule-id) for a specified application rule**
```bash
npx voxengine-ci upload --application-name your_application_name --rule-name your_rule_name
```
**Build and force upload application scenarios (by specifying application-name/application-id) for ALL application rules**
This command is useful if scenarios have been modified on the platform without using voxengine-ci and you are going to overwrite those changes.
```bash
npx voxengine-ci upload --application-name your_application_name --force
```
**Build and force upload application scenarios (by specifying application-name/application-id and rule-name/rule-id) for a specified rule**
This command is useful if scenarios have been modified on the platform without using voxengine-ci and you are going to overwrite those changes.
```bash
npx voxengine-ci upload --application-name your_application_name --rule-name your_rule-name --force
```
## CI/CD templates
Use [templates](https://github.com/voximplant/voxengine-ci/tree/main/ci-cd-templates) for your repository to integrate with our CI. Let us see how to do that.
### GitLab
Include a [GitLab template](https://github.com/voximplant/voxengine-ci/blob/main/ci-cd-templates/.gitlab.yml) in your CI/CD job:
```yaml
include:
- remote: 'https://github.com/voximplant/voxengine-ci/ci-cd-templates/.gitlab.yml'
```
Define env variables:
* `VOX_CI_CREDENTIALS` – path to your JSON credentials file (**vox\_ci\_credentials.json** by default)
* `VOX_CI_CREDENTIALS_CONTENT` – **vox\_ci\_credentials.json** file contents in the JSON format
Use the `extends` keyword to reuse the `.voxengine-ci` configuration sections from the template:
```yaml
your-job:
extends:
- .voxengine-ci
script:
- your-script-part-one
- your-script-part-two
- etc.
```
You can customize your script using the following example:
```yaml
your-job:
extends:
- .voxengine-ci
variables:
VOX_CI_CREDENTIALS: $SECRET_FILE_PATH
VOX_CI_CREDENTIALS_CONTENT: $SECRET_FILE_CONTENT
dependencies:
- build
when: manual
only:
- master
tags:
- docker
script:
- npx voxengine-ci upload --applicaiton-id 123456
- npx voxengine-ci upload --application-name my_first_application
- npx voxengine-ci upload --application-name my_first_application --rule-name my_second_rule --dry-run
```
### GitHub
Copy the [.github.yml file](https://github.com/voximplant/voxengine-ci/blob/main/ci-cd-templates/.github.yml) contents to your repository at **.github/workflows/any\_file\_name.yml**.
Define the GitHub Actions secrets in the **settings/secrets/actions** section of your GitHub project:
* `VOX_CI_CREDENTIALS` – path to your JSON credentials file (**vox\_ci\_credentials.json** by default)
* `VOX_CI_CREDENTIALS_CONTENT` - **vox\_ci\_credentials.json** file contents in the JSON format
You can customize your script using the following example:
```yaml
name: voxengine-ci
on: workflow_dispatch
jobs:
your-job:
runs-on: ubuntu-latest
needs: [build]
steps:
- uses: actions/checkout@v3
- name: Setup Node.js
uses: actions/setup-node@v3
with:
node-version: '16'
check-latest: true
- name: Install voxengine-ci
run: npm ci
- name: Prepare credentials
run: echo "${{ env.VOX_CI_CREDENTIALS_CONTENT }}" > ${{ env.$VOX_CI_CREDENTIALS }}
env:
VOX_CI_CREDENTIALS: ${{ secrets.SECRET_FILE_PATH }}
VOX_CI_CREDENTIALS_CONTENT: ${{ secrets.SECRET_FILE_CONTENT }}
- name: Run voxengine-ci scripts
run: |
npx voxengine-ci upload --applicaiton-id 123456
npx voxengine-ci upload --application-name my_first_application
npx voxengine-ci upload --application-name my_first_application --rule-name my_second_rule --dry-run
```
### Jenkins
Install all necessary plugins:
* NodeJS plugin. After the plugin is installed, click **Add NodeJS** in the **NodeJS installations** section (in Global Tool Configuration) and specify a name (e.g. "nodejsinstallation" - this name displays in the **Build environment** section).
* Git plugin
* Credentials binding plugin
* Pipeline plugin (for using Jenkinsfile)
#### Creating a job via the "Freestyle project" item
Create a new item and select **Freestyle project**.
In **Source code management**, choose the **Git** option and specify the repository URL and credentials. If there are no SSH credentials in Jenkins yet, generate them and add a private key of the **SSH Username with private key** type (choose the **Enter directly** option in the **Private key** section), and add a public key in your git account (**SSH keys** section).
In **Build environment**, choose the **Use secret text(s) or file(s)** option, specify the "VOX\_CI\_CREDENTIALS" name for the corresponding variable, and add the "vox\_ci\_credentials.json" file of the **Secret file** type with credentials of your vox account.
Check **Provide node & npm bin/ folder to PATH** in the **Build environment** section and specify the name of the NodeJS installation ("nodejsinstallation" in our example).
In the **Build** section, select **Execute shell** in the **Build step** dropdown list and add the following script:
```bash
npm ci
npx voxengine-ci upload --application-name my-application
```
The job is ready to run.
#### Using Jenkinsfile
In your project repository, add a Jenkinsfile:
```bash
pipeline {
agent any
tools {nodejs "nodejsinstallation"} // name of your NodeJS installation
stages {
stage('Before-publish') {
steps {
sh "npm ci"
}
}
stage('Publish') {
steps {
sh "npx voxengine-ci upload --application-name test" // your voxengine-ci script
}
}
}
}
```
Create the **Pipeline** Item.
Select **Pipeline script from SCM** in the **Pipeline** section.
Select **Git** from the **SCM** dropdown list, set your repository URL using SSH, and choose credentials. If you do not have credentials yet, click **Add** and select the **SSH Username with private key** type. Then add a private key (in the **Private key** section, choose **Enter directly**) and a public key in your git account (**SSH keys**).
Specify **Jenkinsfile** in **Script path**.
The pipeline is ready!
## Instruments
* [node.js](https://nodejs.org/en/)
* [typescript](https://www.typescriptlang.org/)
* [dotenv](https://www.npmjs.com/package/dotenv)
* [@voximplant/apiclient-nodejs](https://www.npmjs.com/package/@voximplant/apiclient-nodejs)