Initial Voximplant Setup
For the complete documentation index, see llms.txt.
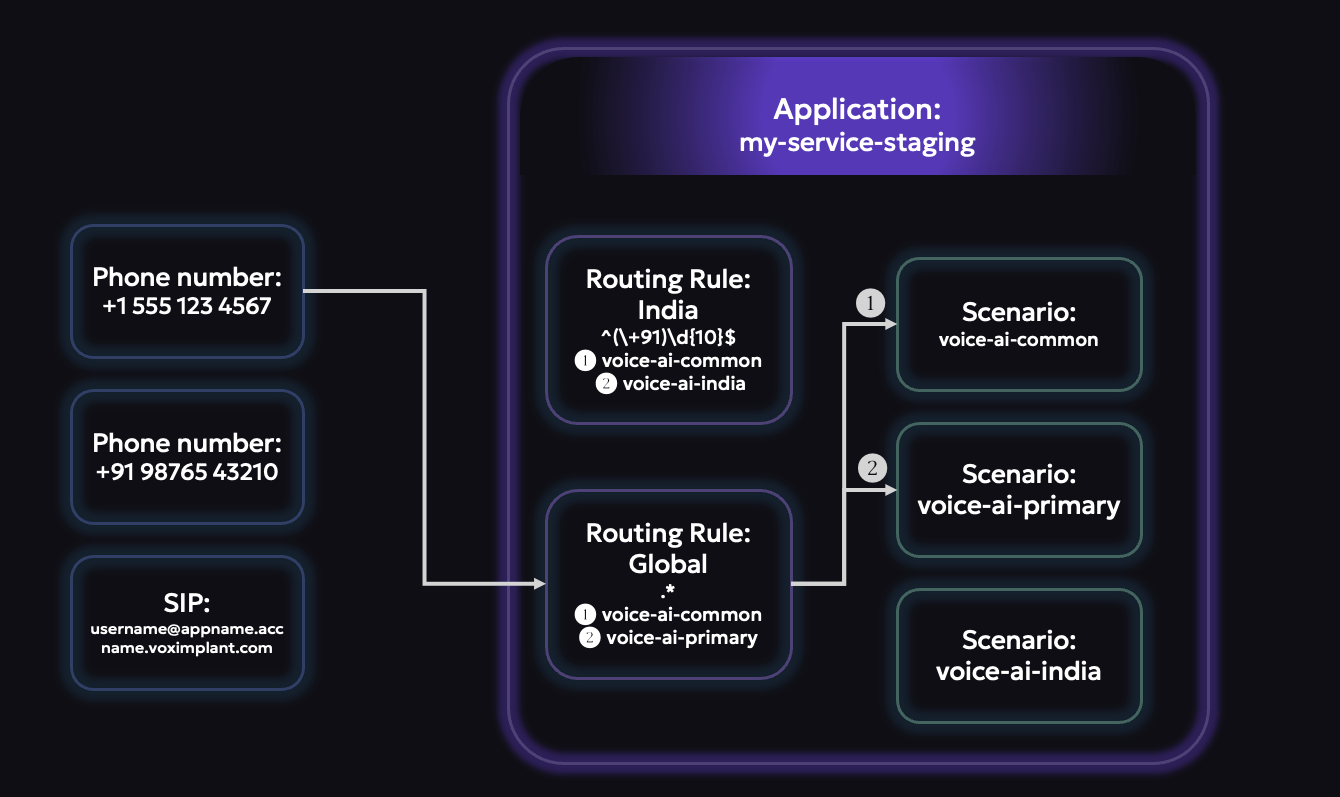
VoxEngine setup is centered on three components:
Applications: top-level containers for each environmentScenarios: JavaScript programs that control callsRouting rules: destination patterns that trigger scenarios
For your first project, we recommend configuring one application first, adding one scenario, and attaching a single routing rule that can receive test traffic.
you can start by doing this via Voximplant’s Control Panel (manage.voximplant.com) and later use the management API to do this programmatically.
Setup order
Create an account
Use manage.voximplant.com to configure applications, scenarios, routing, channels, and storage.
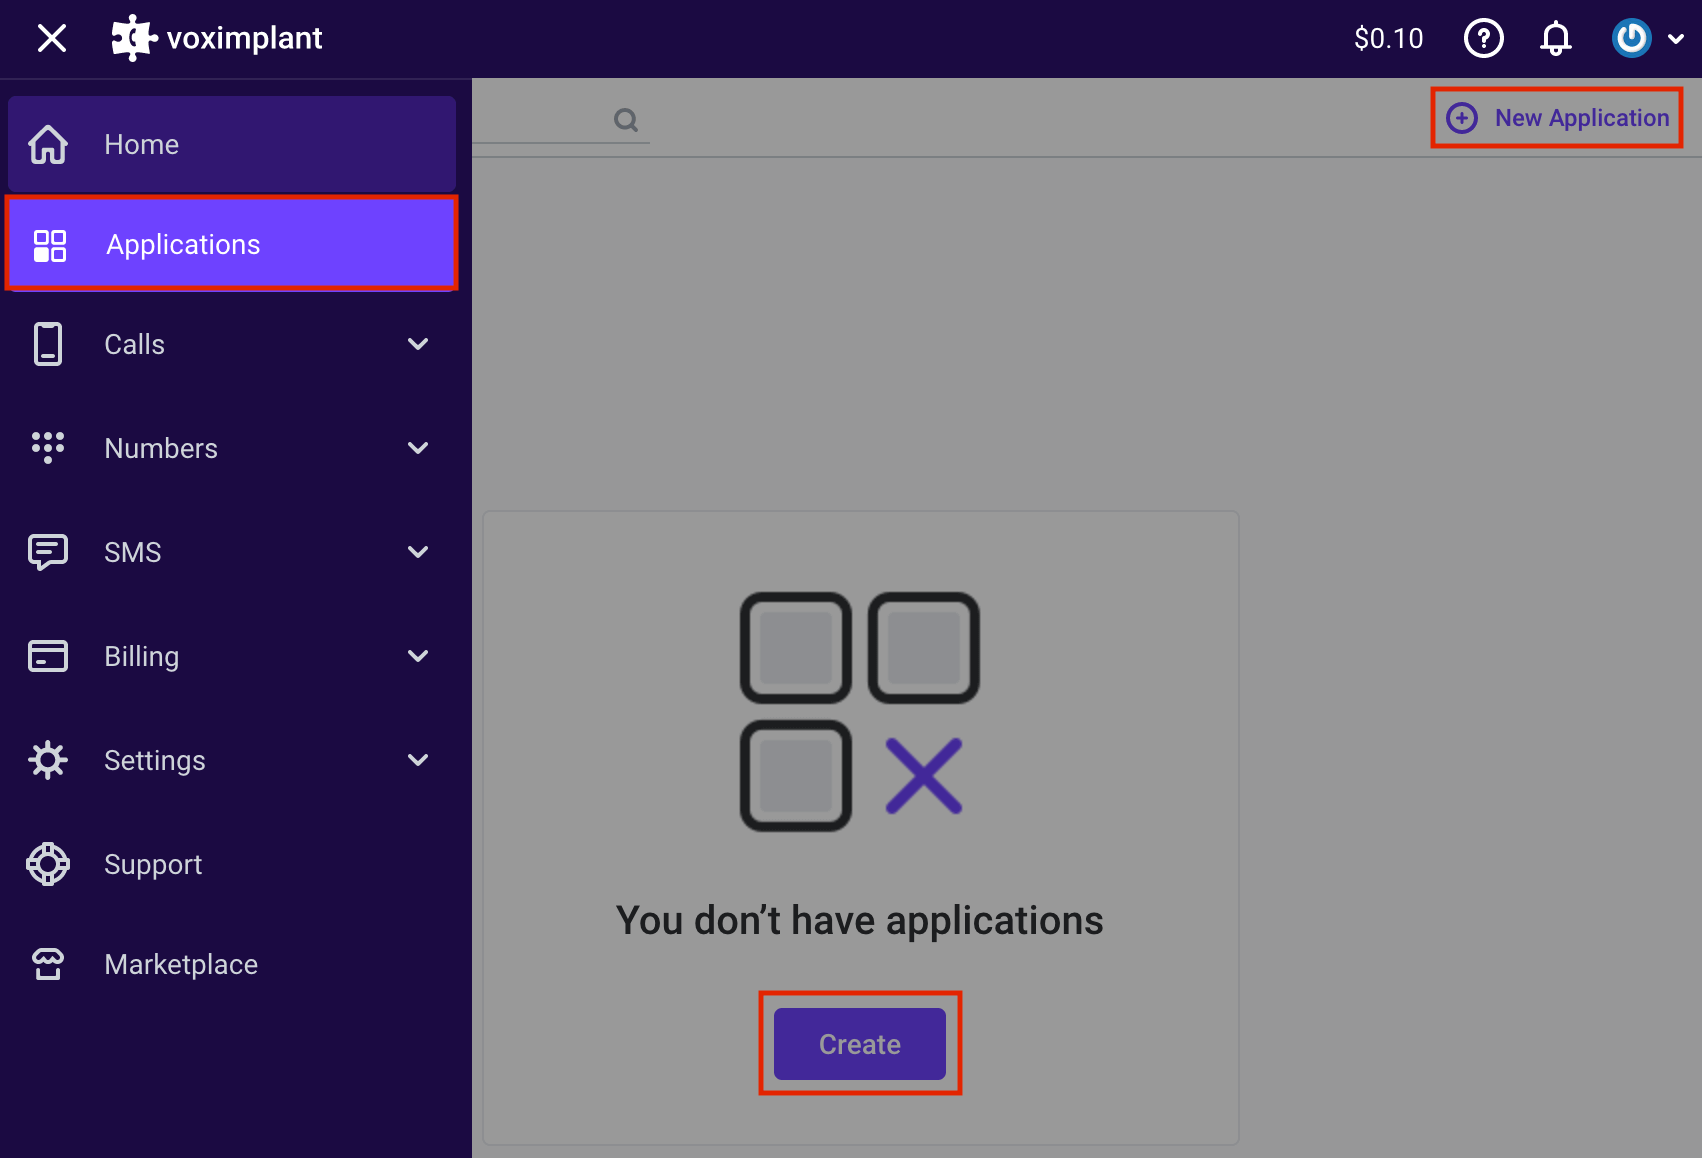
Create an application
A Voximplant application is the top-level container for a task or environment. It holds scenarios, users, routing rules, and attached numbers.
Use different applications for projects that do not share the same Voximplant resources - prod-agent-global vs. new-agent-prototype -
or for intentional isolation - such as voice-ai-staging vs. voice-ai-production.
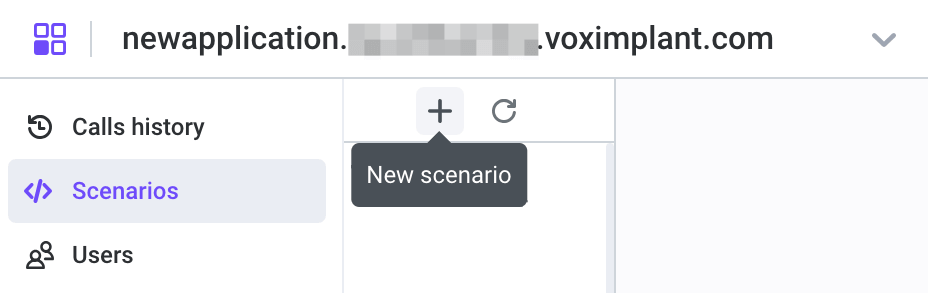
Create a scenario
Scenarios are JavaScript documents inside an application. VoxEngine executes them when a routing rule matches.
We recommend that you keep scenario names short and specific since there are situations where you may use this channel name elsewhere (like with SIP routing).
Setup routing
Routing rules decide which scenario starts for an incoming destination or a manually triggered outbound flow. For example,
^(\+91)\d{10}$ could go to an India-specific voice AI scenario, while ^(\+1)\d{10}$ could go to a US-specific one.
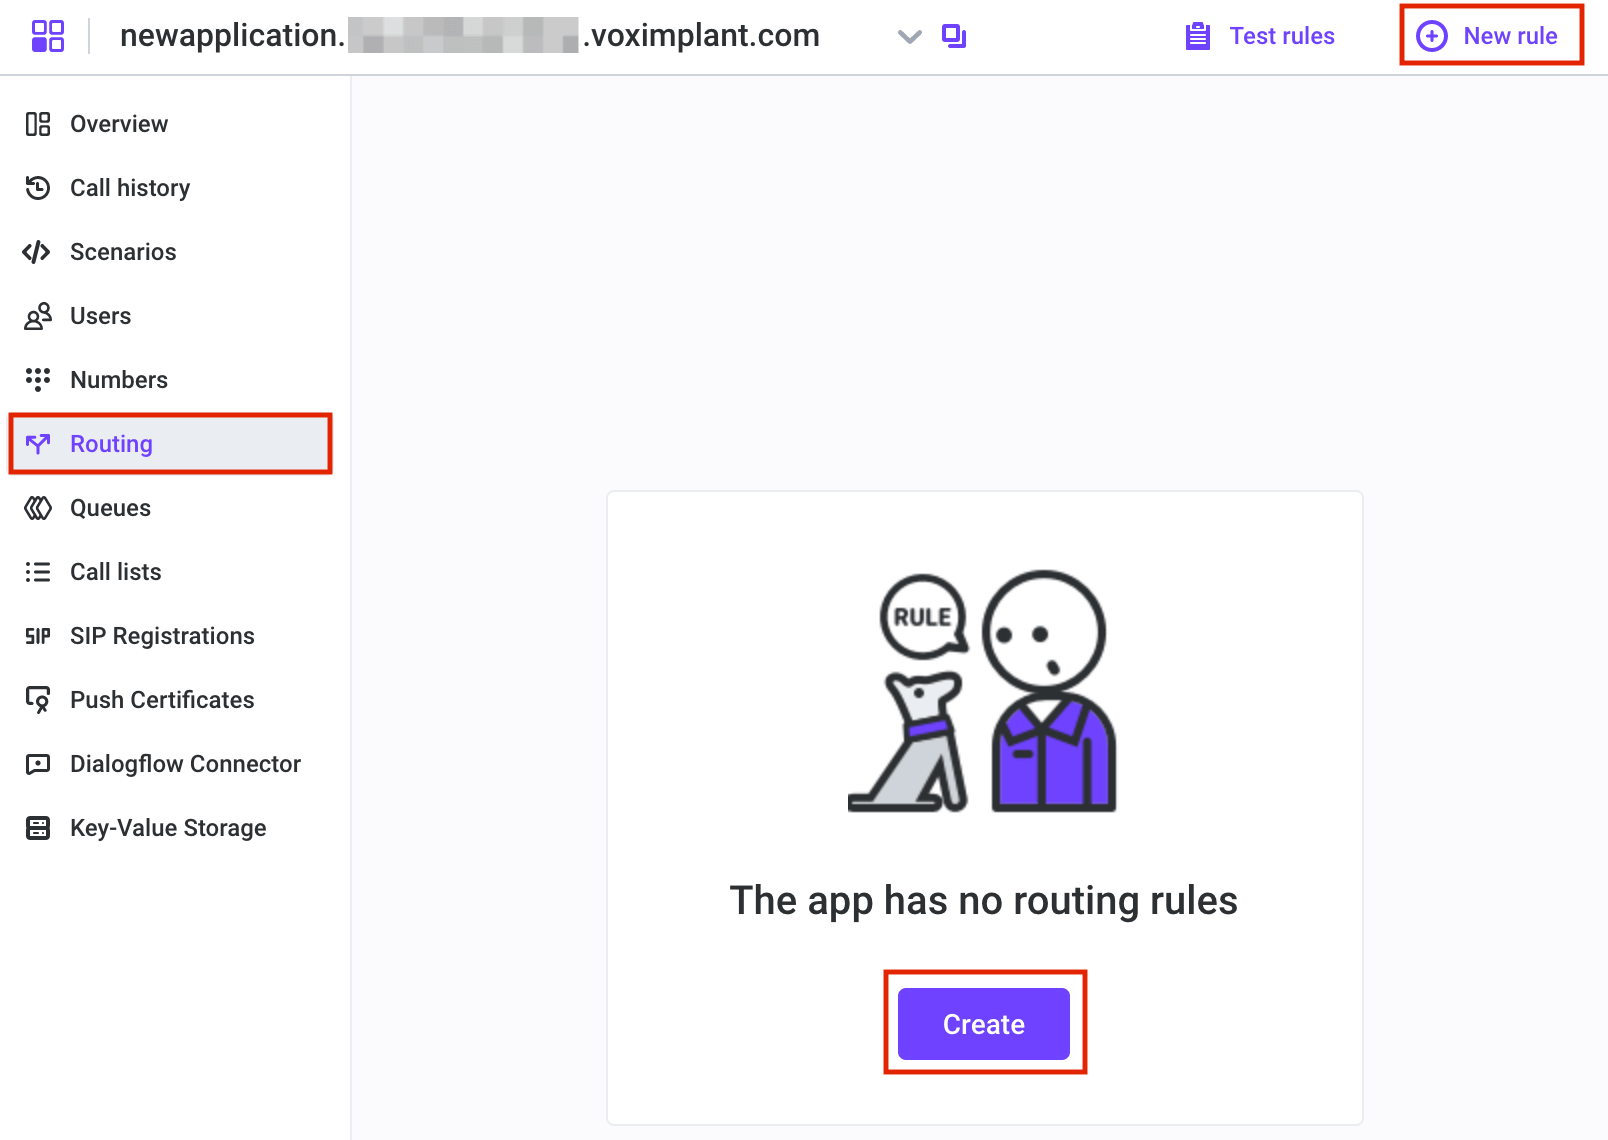
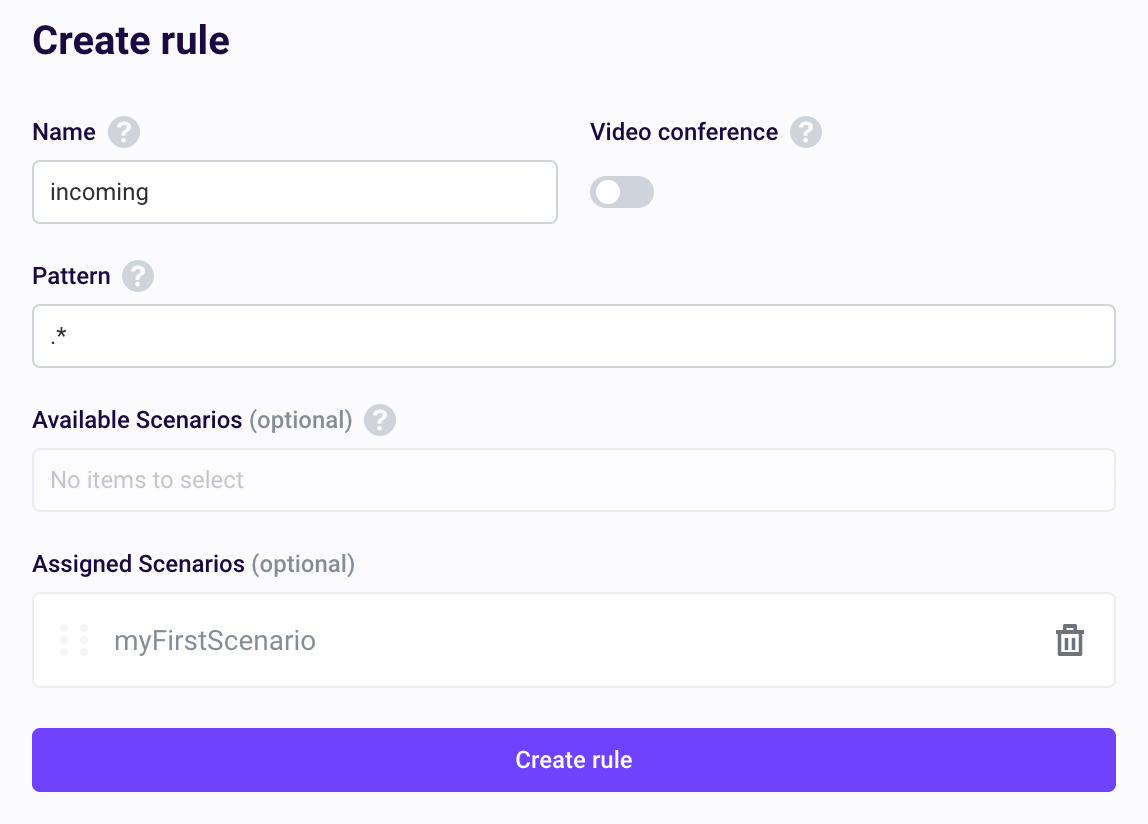
For your first rule, we recommend a using .* to matches all destinations. You can create more specific rules later as needed.
Regular Expression pattern basics:
.*matches any destination (good as a starting point & fallback)+?[1-9]\d{1,14}matches E.164-style numbers123.+matches destinations starting with123
Routing evaluation is top-to-bottom. The first matching rule is used.
As you get more advanced with more unique situations, you can consider patterns such as:
- One explicit test rule with a unique alias/pattern
- One fallback global rule (
.*) below it
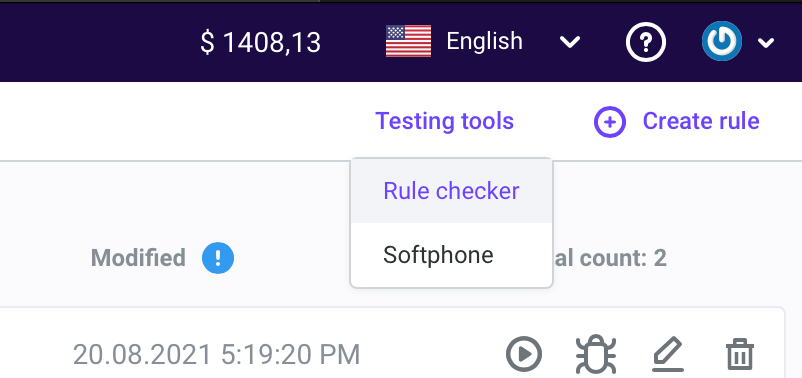
Voximplant also includes a rule check that will help verify your patterns.
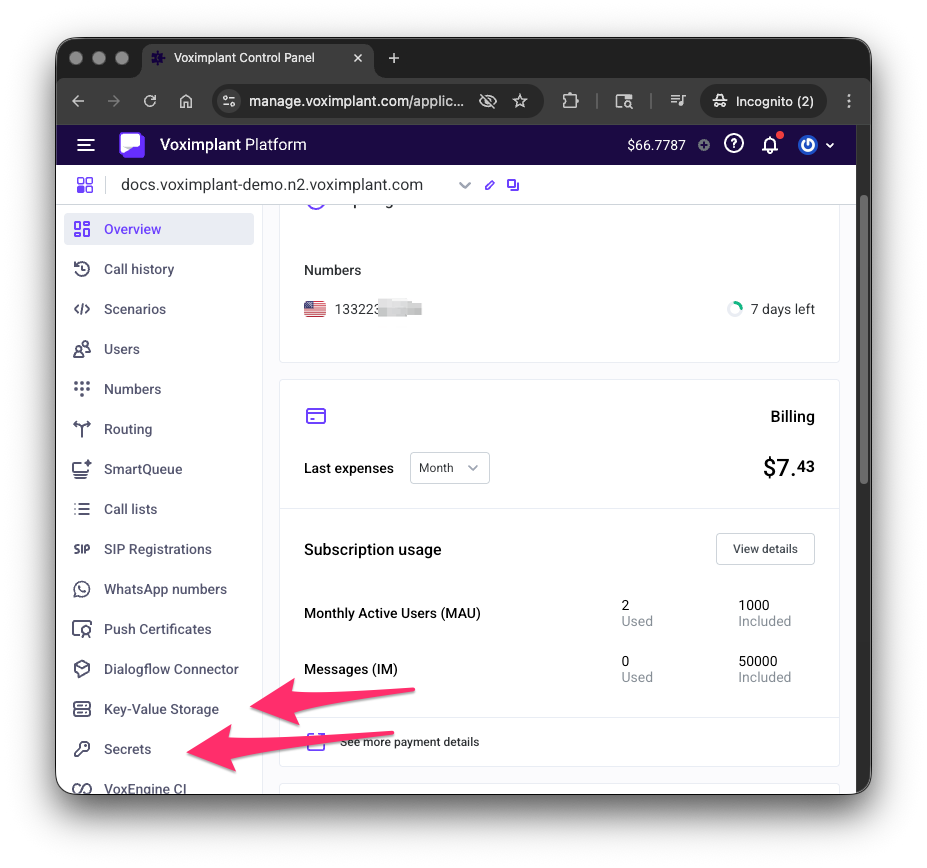
Application Storage and Secrets
Voximplant provides two separate stores for every application:
- Secrets — for sensitive values such as API keys, tokens, and passwords. Use
VoxEngine.getSecretValue('<name>')to read them. - Application Storage (
ApplicationStorage) — a key-value store for small non-sensitive config values like destination numbers, feature flags, and shared counters across scenario instances.
The examples in this guide use Secrets to hold API keys for external services (for example OPENAI_API_KEY) and ApplicationStorage for non-sensitive config.
Example: