Skip to navigation

WhatsApp

Connect WhatsApp Business calling to Voximplant scenarios
View as Markdown

For the complete documentation index, see llms.txt.

Overview

WhatsApp integration lets you process WhatsApp calls/messages with VoxEngine logic and route them to your Voice AI scenarios. Use the integration flow to connect Meta credentials, complete verification, and attach numbers.
WhatsApp integration overview

Prerequisites

  • Meta developer account with a WhatsApp Business app in developers.facebook.com.
  • WhatsApp Business phone number added in WhatsApp Manager and ready for verification.
  • Meta Cloud API credentials: Temporary Access Token and Phone Number ID.

Inbound

Full inbound setup walkthrough video

Use this step-by-step video to see the full setup in Meta and Voximplant.

Video link: WhatsApp Business Calling setup overview

Setup flow (Inbound)

1

Prepare WhatsApp Cloud API in Meta

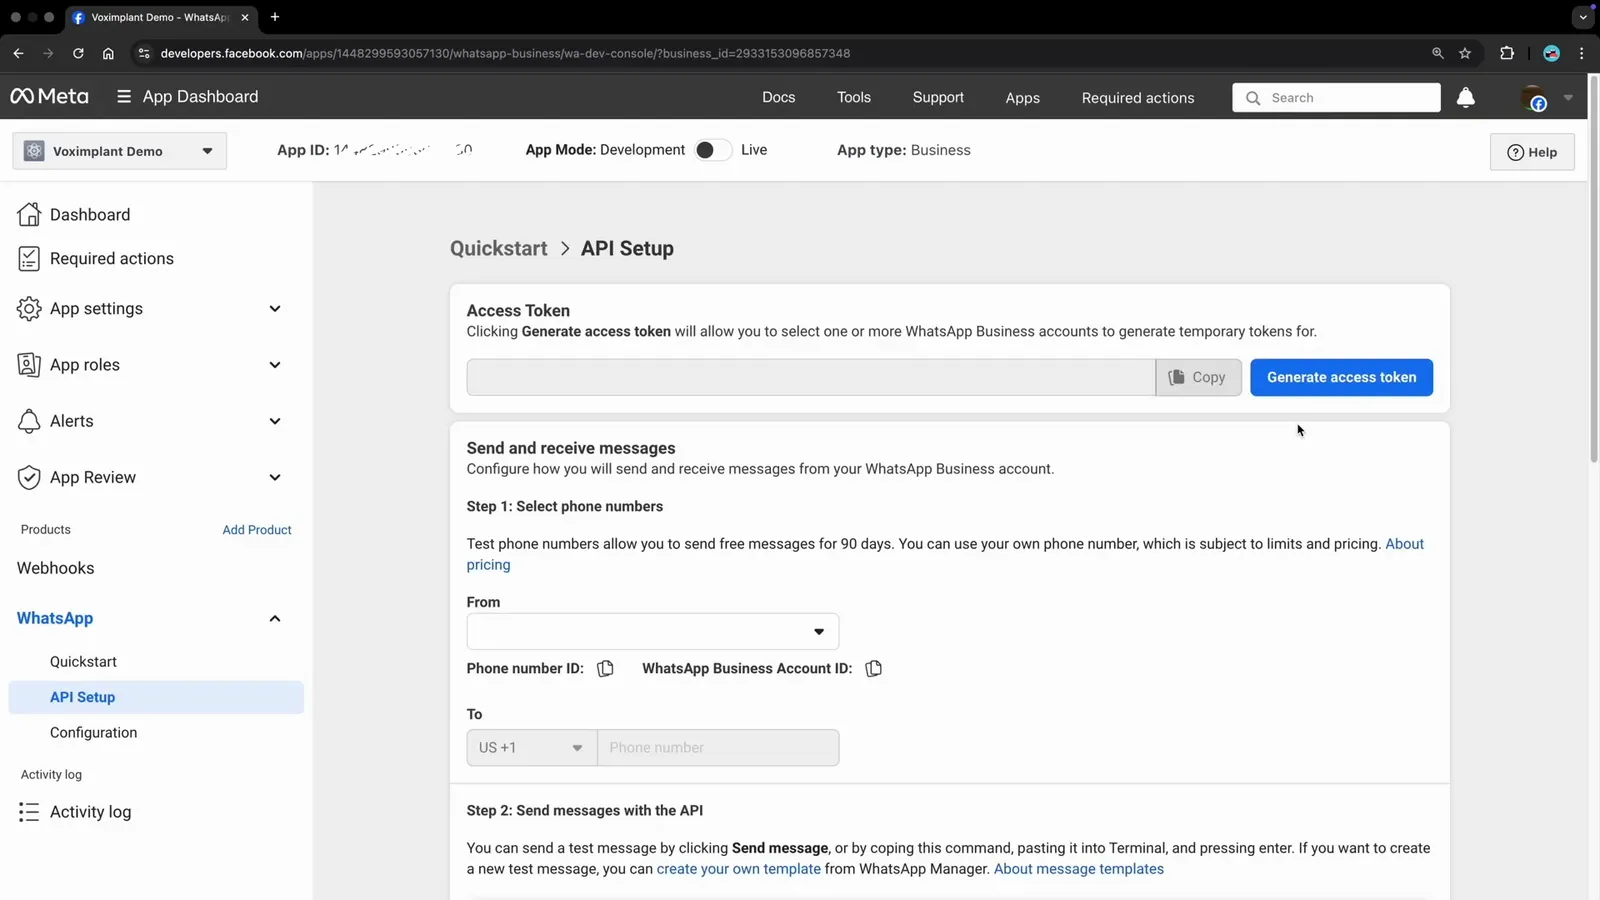
In developers.facebook.com/apps, create a Business app, add WhatsApp, and open WhatsApp > API Setup. Keep your Temporary Access Token and Phone Number ID available. Meta API Setup
2

Verify and register the WhatsApp number on the Meta side

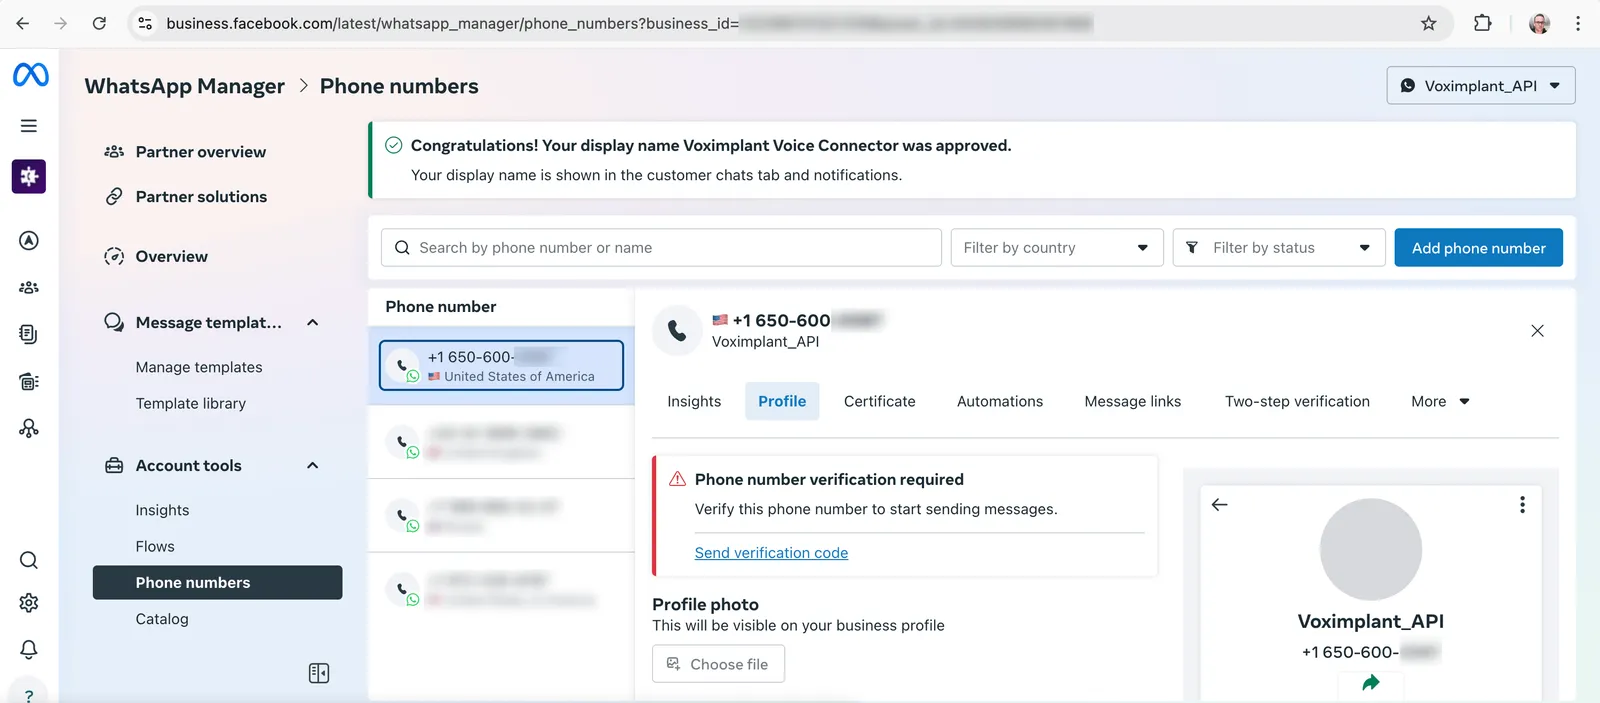
In WhatsApp Manager, complete verification and registration on the WhatsApp Cloud API side:

  1. In the Profile tab, click Send verification code. Send verification code
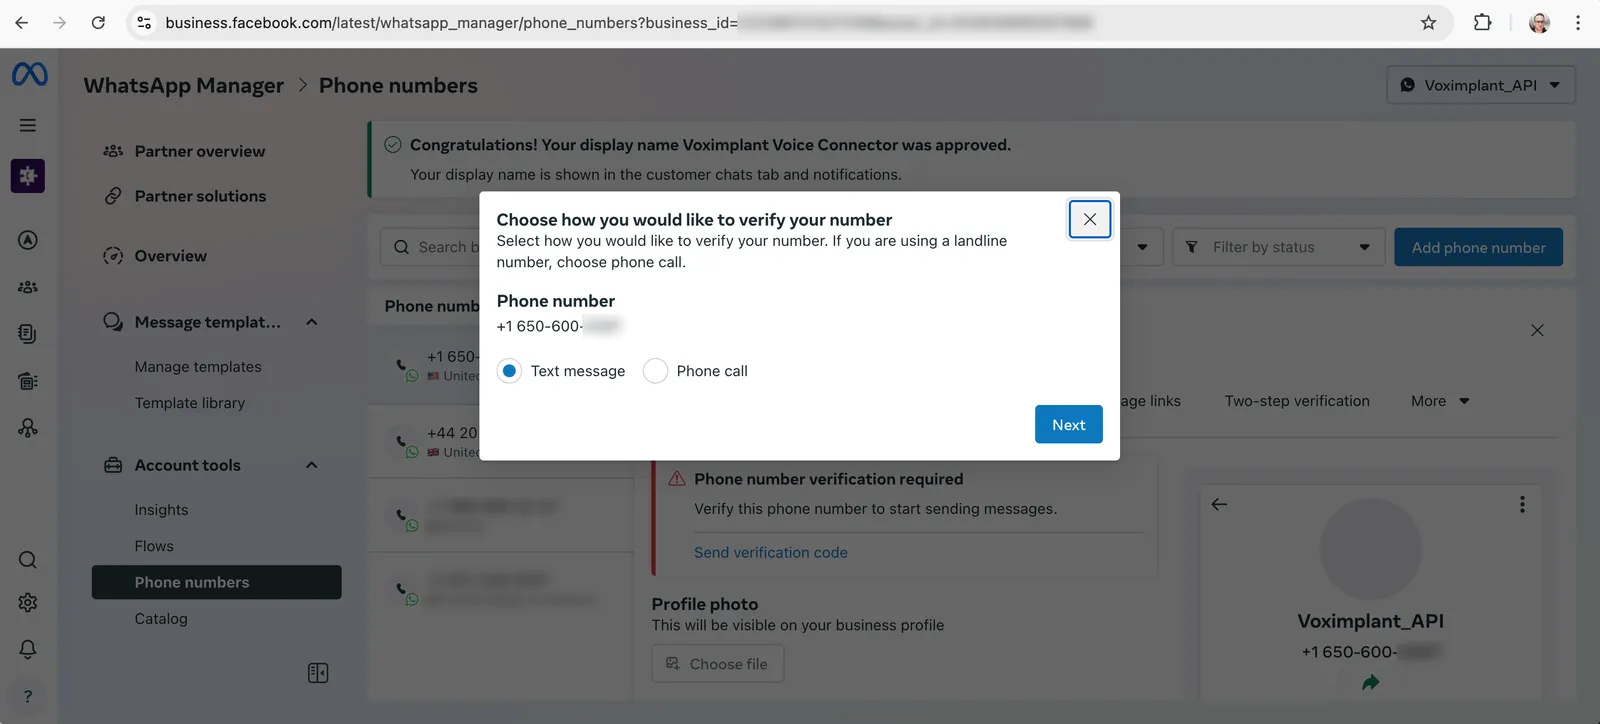
  2. Choose how to receive the code (SMS or phone call). Choose verification method
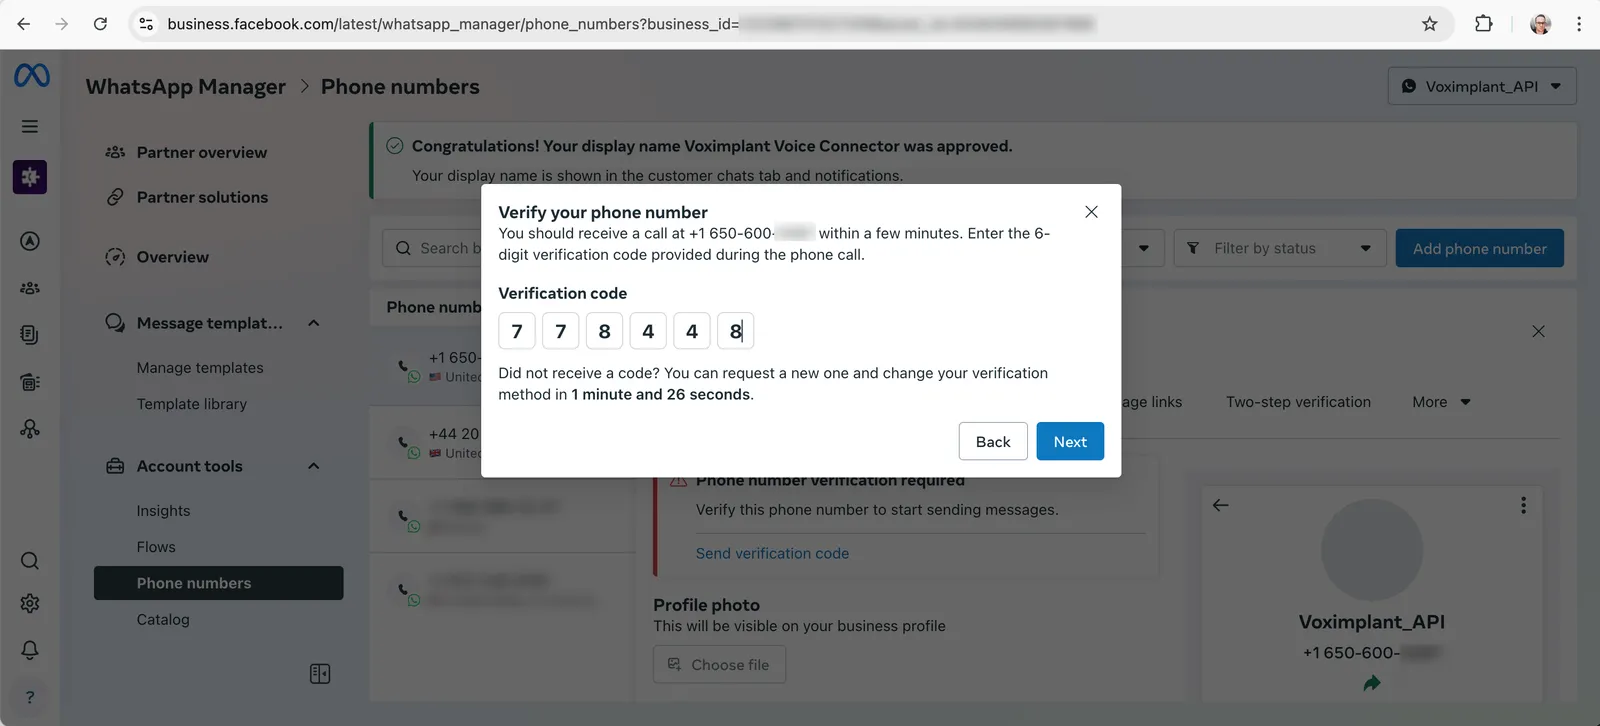
  3. Enter the received code and keep it for the registration step. Enter verification code
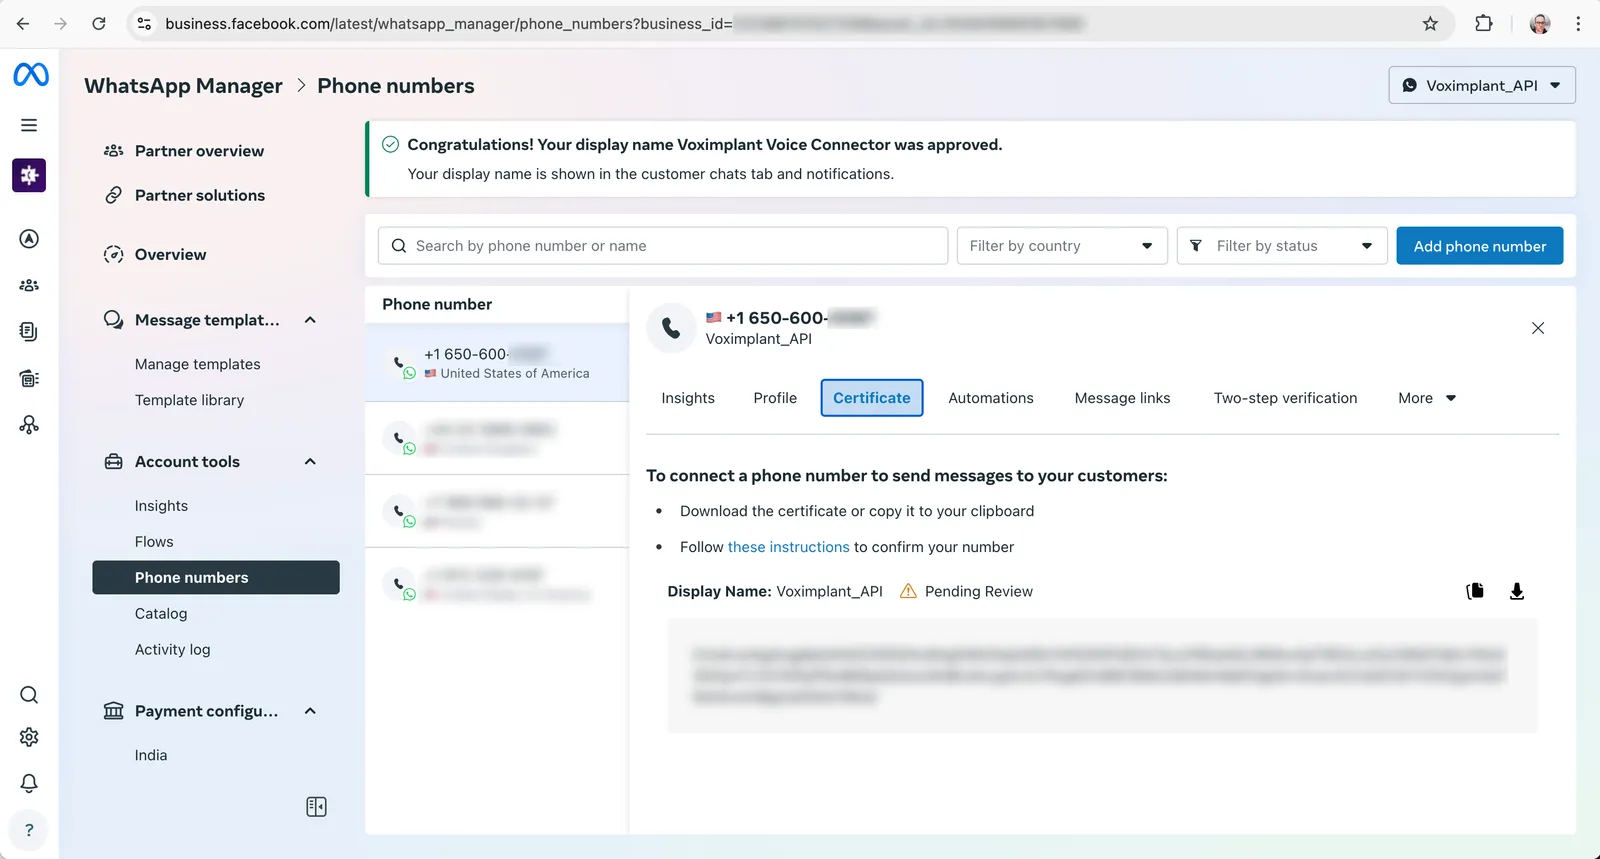
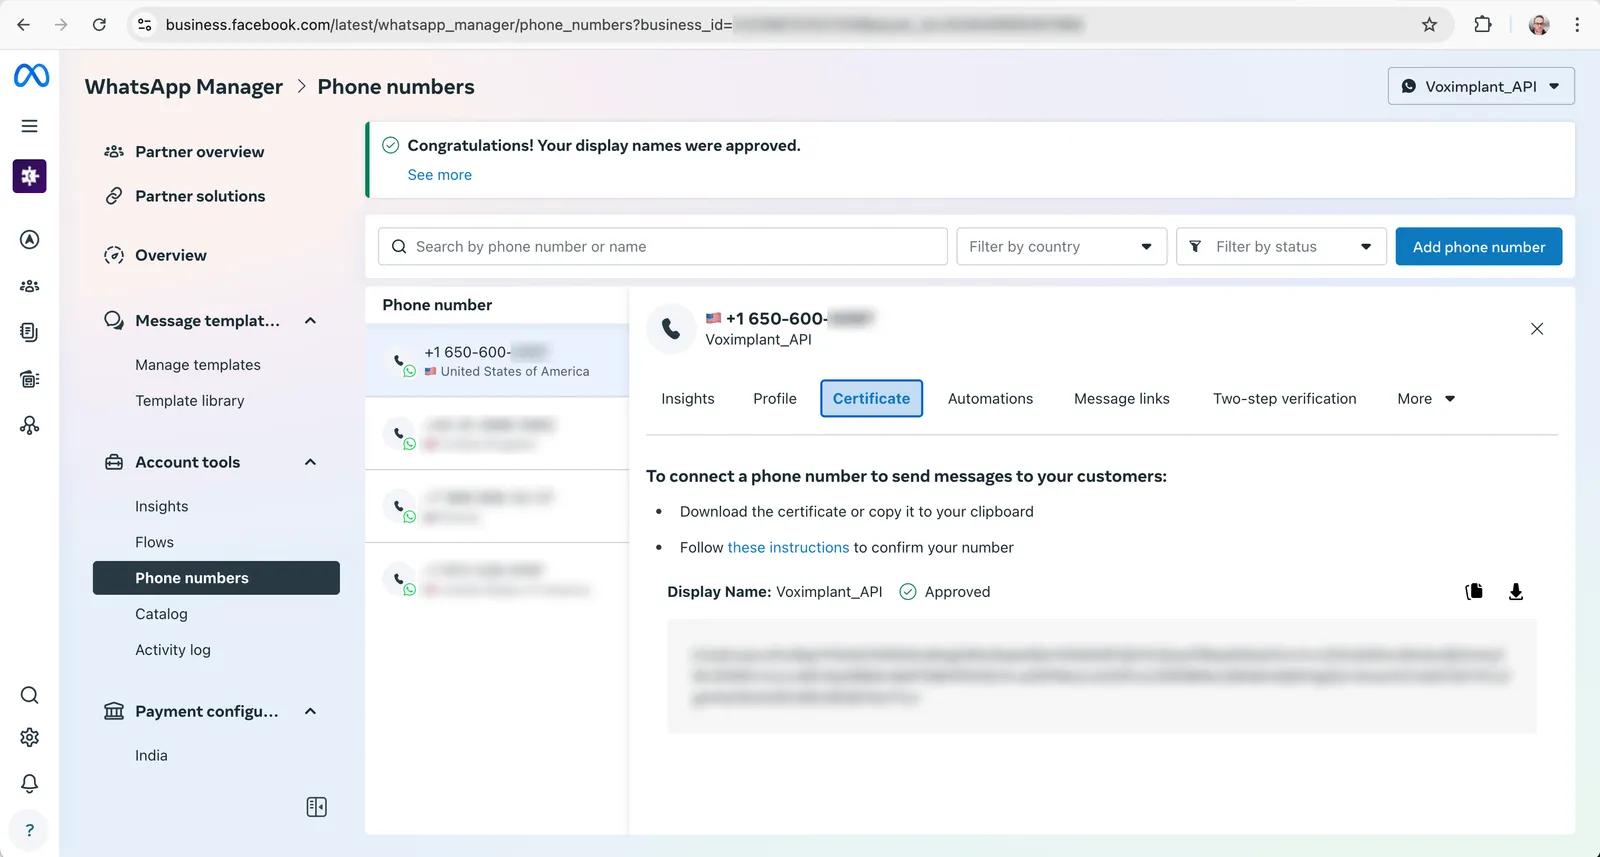
  4. Open the Certificate tab and wait until Display Name status becomes Approved. Display Name status
  5. After approval, register the phone number with the Meta Graph API request shown in the guide/modal. Phone registration step
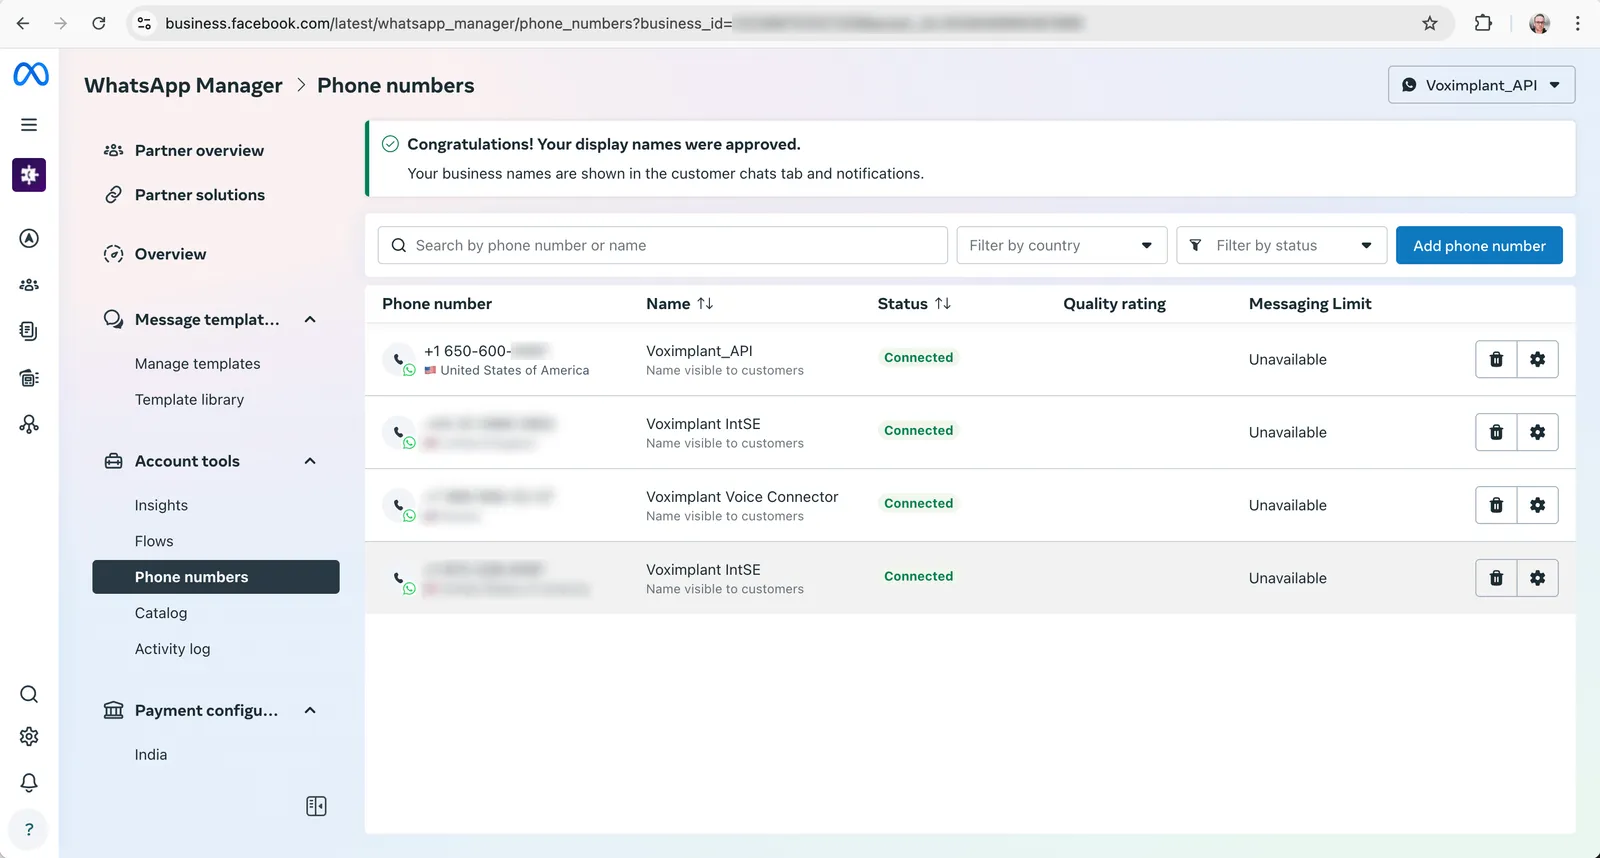
  6. Refresh the phone numbers page and confirm the number status is Connected. Connected status
3

Create Voximplant application

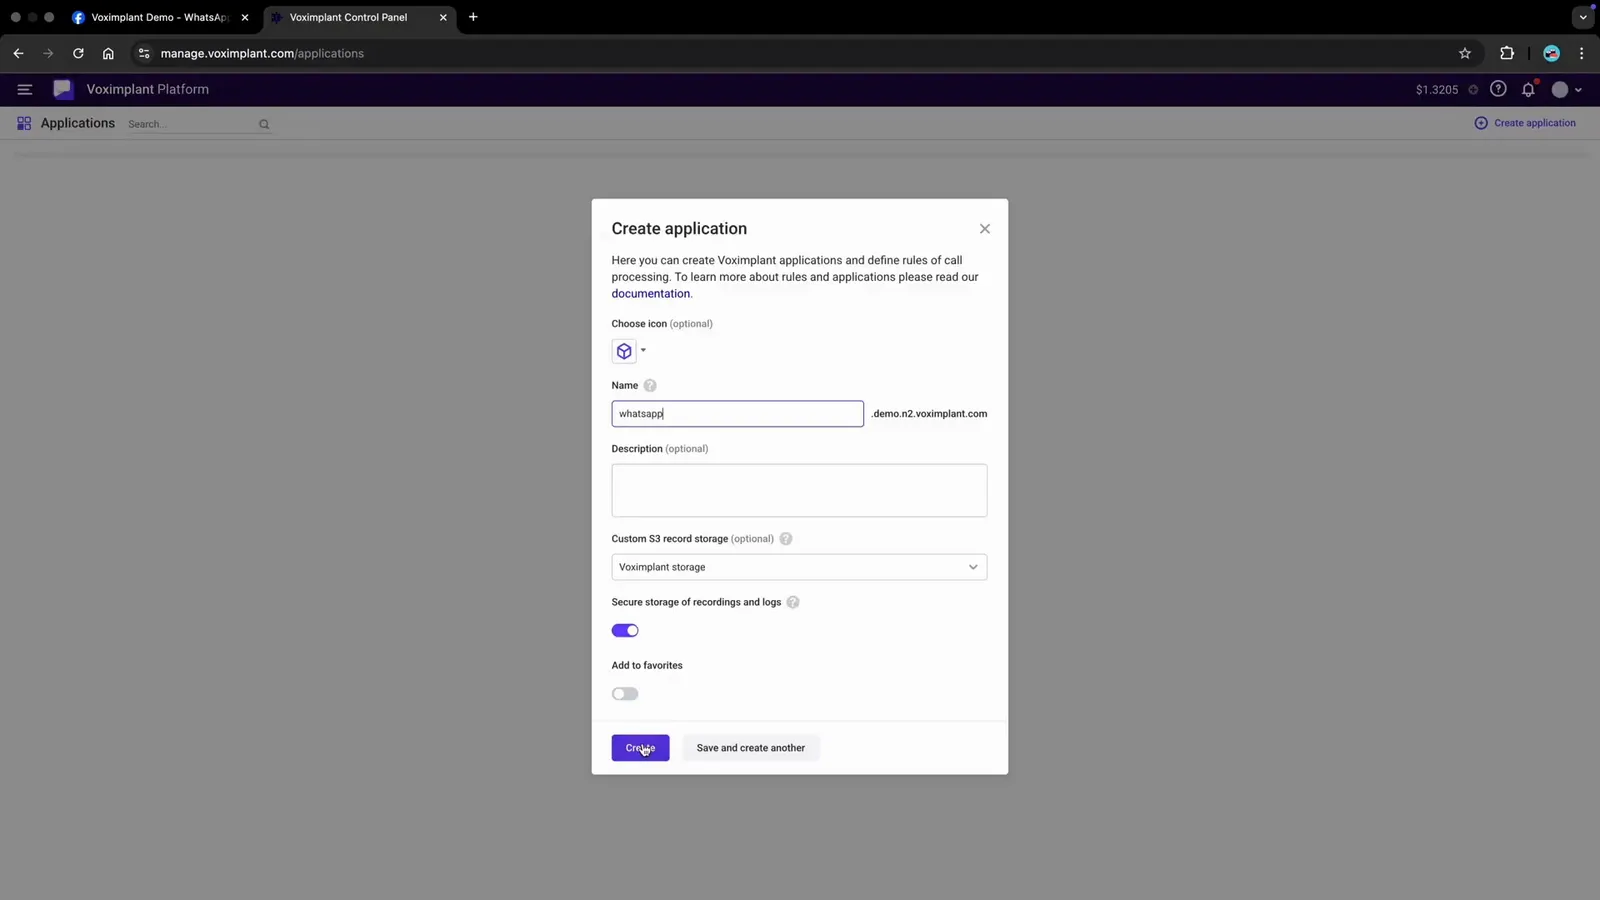
In manage.voximplant.com, create or open an application for this WhatsApp inbound flow. Create Voximplant application
4

Create inbound scenario

Create your inbound scenario (for example whatsapp-inbound) and add the call handling logic. WhatsApp inbound scenario code
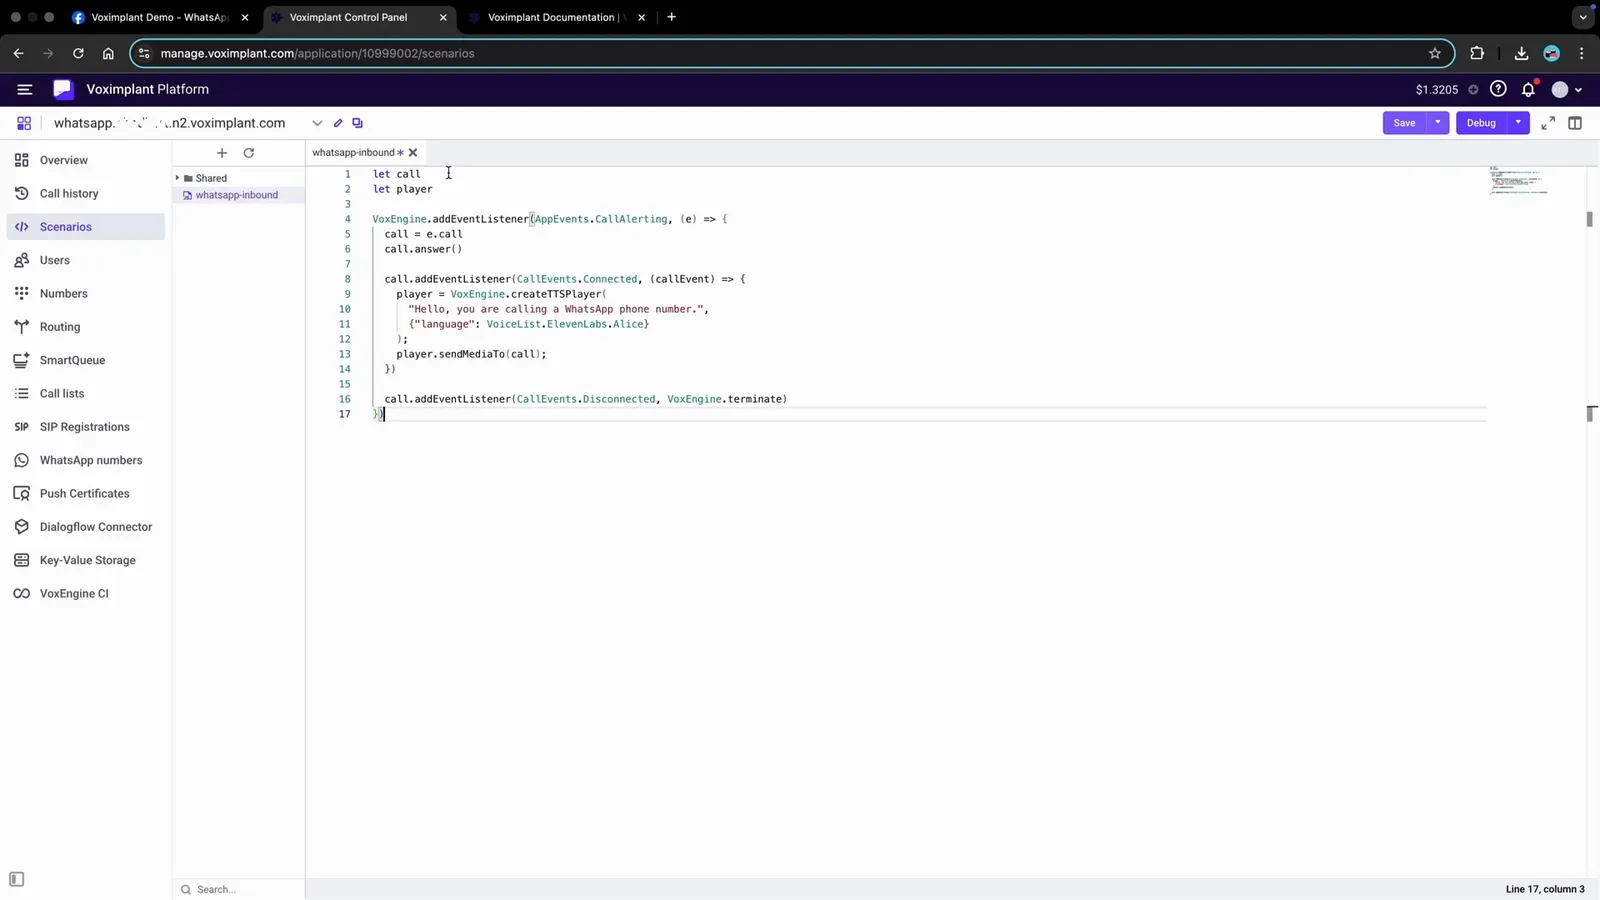
Minimal inbound WhatsApp scenario
VoxEngine.addEventListener(AppEvents.CallAlerting, (event) => {
const call = event.call;
call.answer();
call.say("Hello, this WhatsApp call is connected to Voximplant.", {voice: VoiceList.Amazon.en_US_Joanna});
call.addEventListener(CallEvents.Disconnected, () => VoxEngine.terminate());
});
5

Connect the WhatsApp number in Voximplant

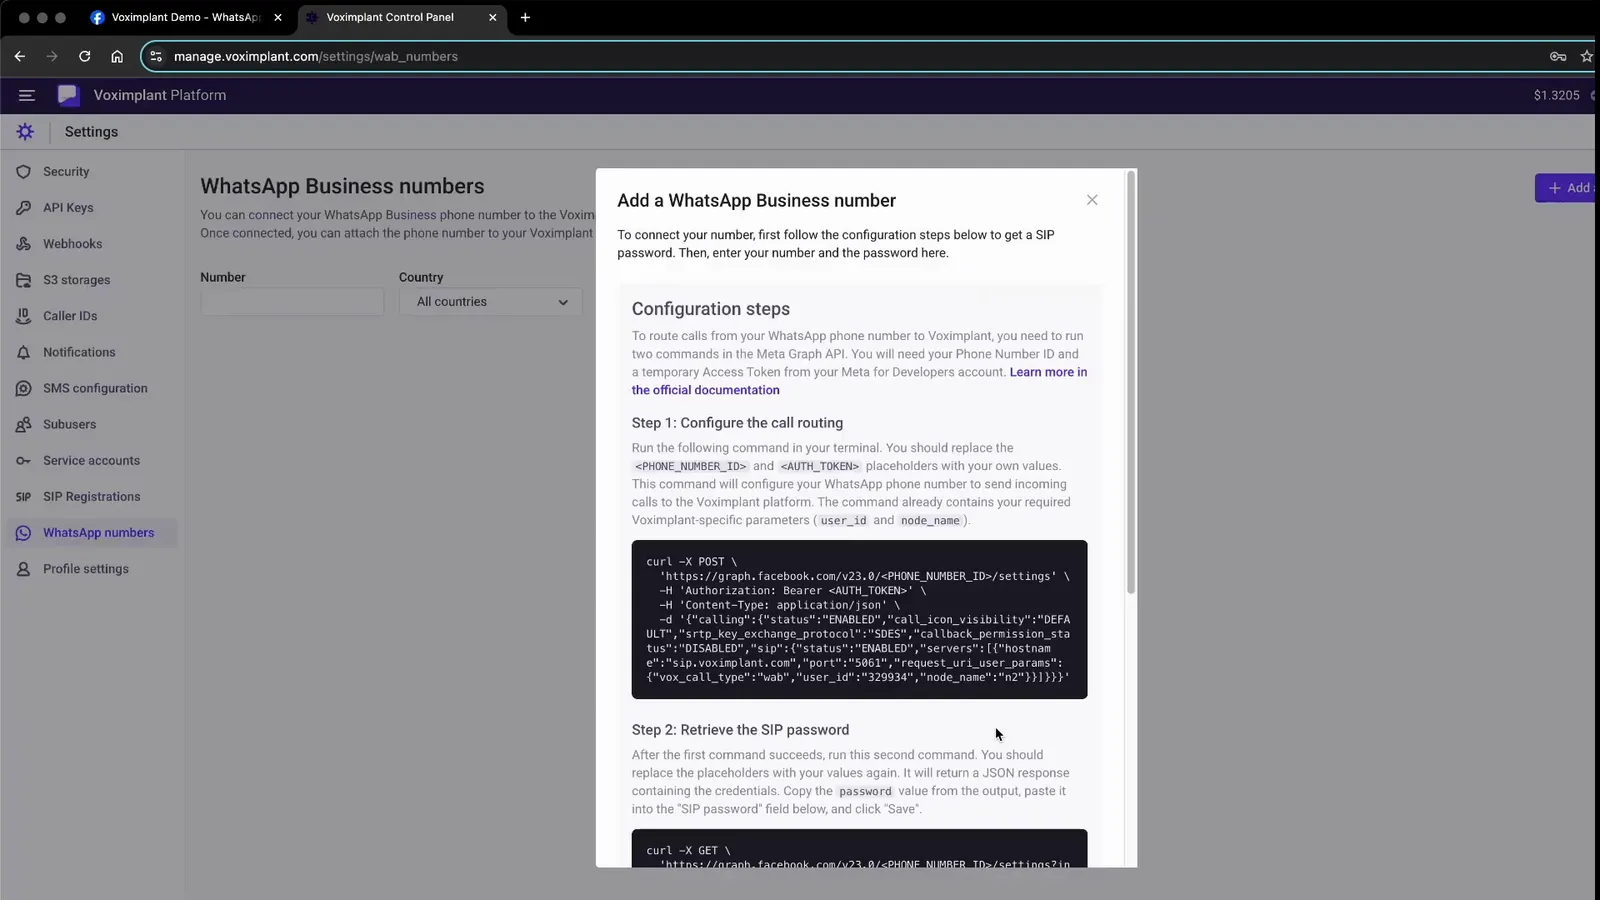
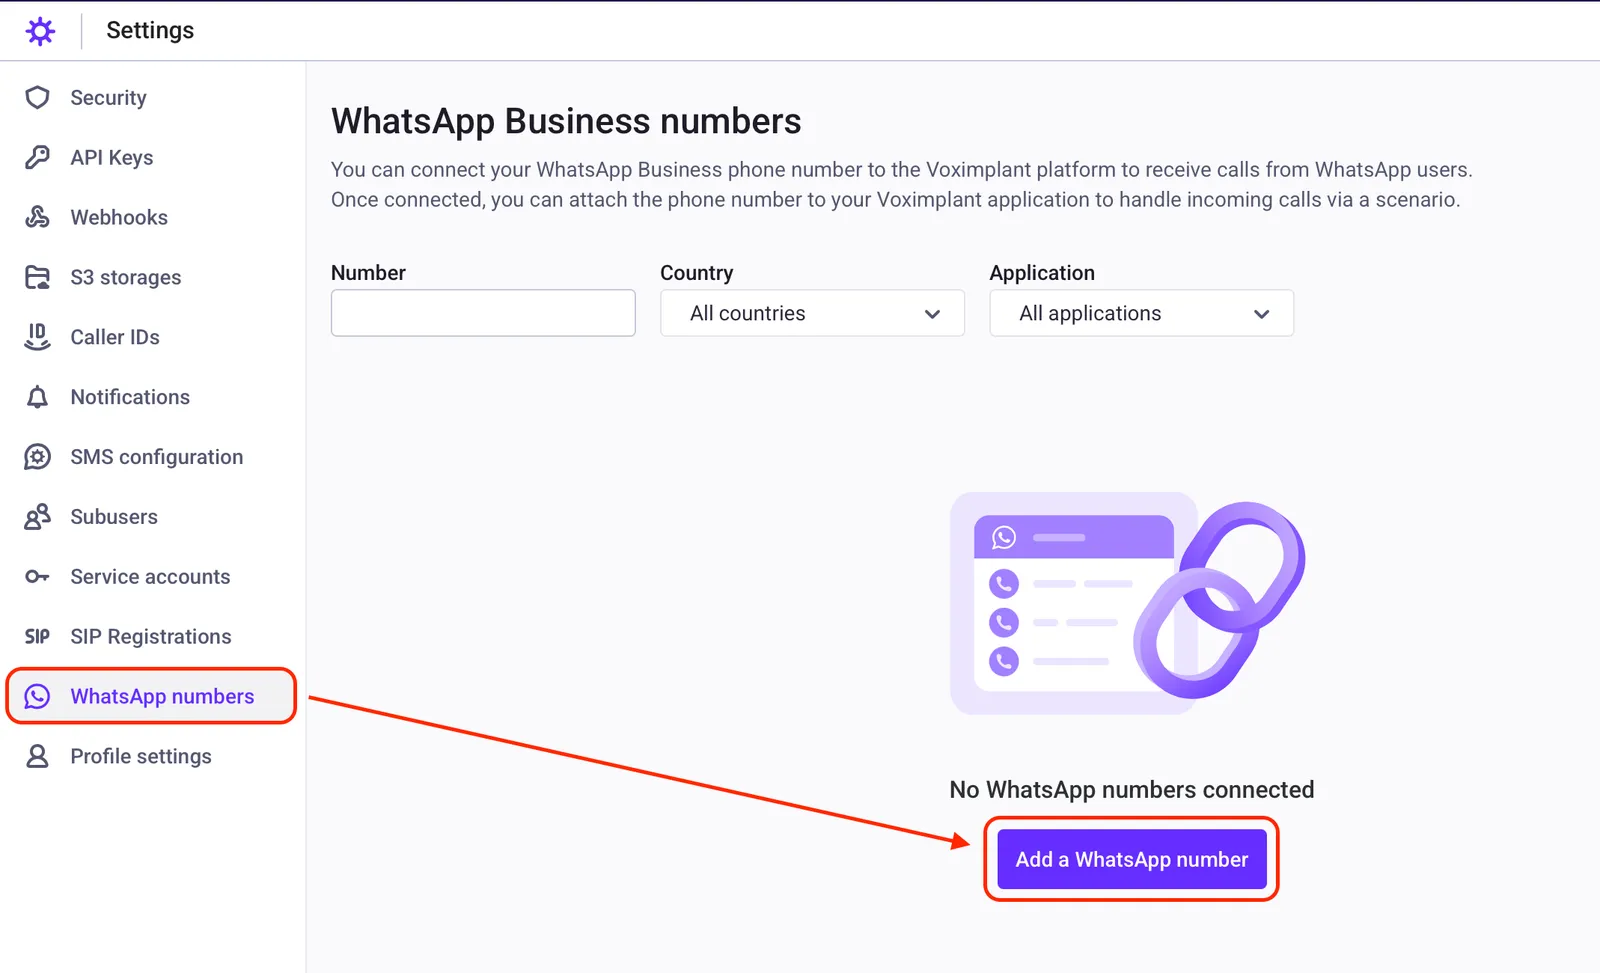
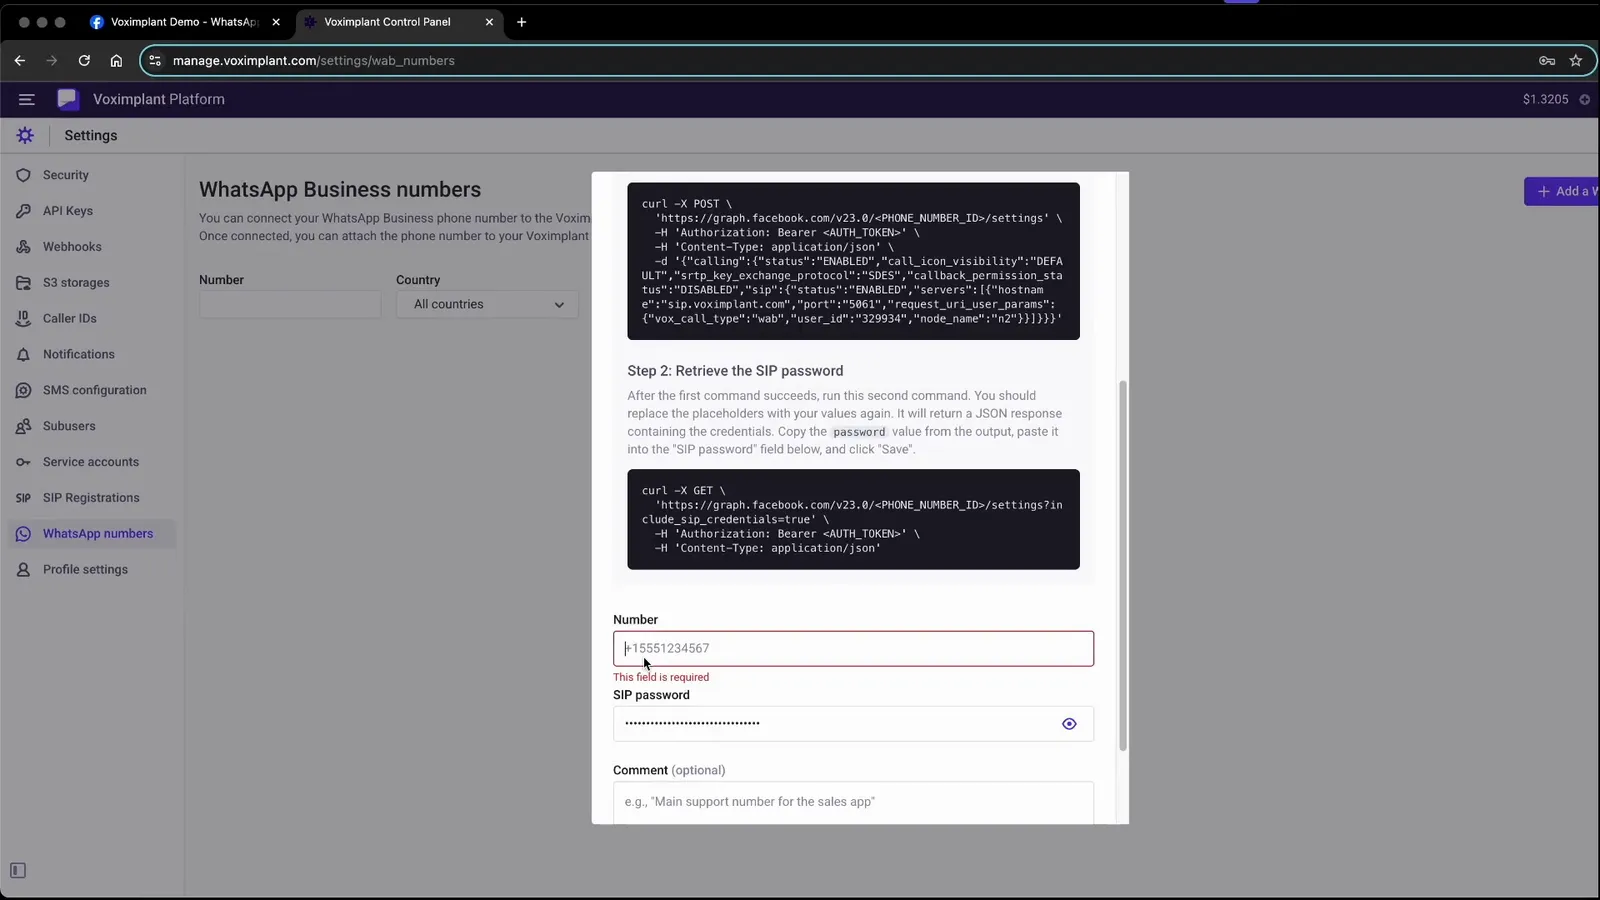
Open WhatsApp numbers in your application and click Add WhatsApp number. WhatsApp numbers in manage.voximplant.com

Follow the modal instructions: WhatsApp configuration modal

You will need to execute the Meta Graph API requests via cURL.

Then copy the returned password into SIP password, set the WhatsApp number, and click Save. Save SIP password
6

Create routing rule

Create a routing rule and attach the inbound scenario. Open your application and go to Routing. Create a routing rule
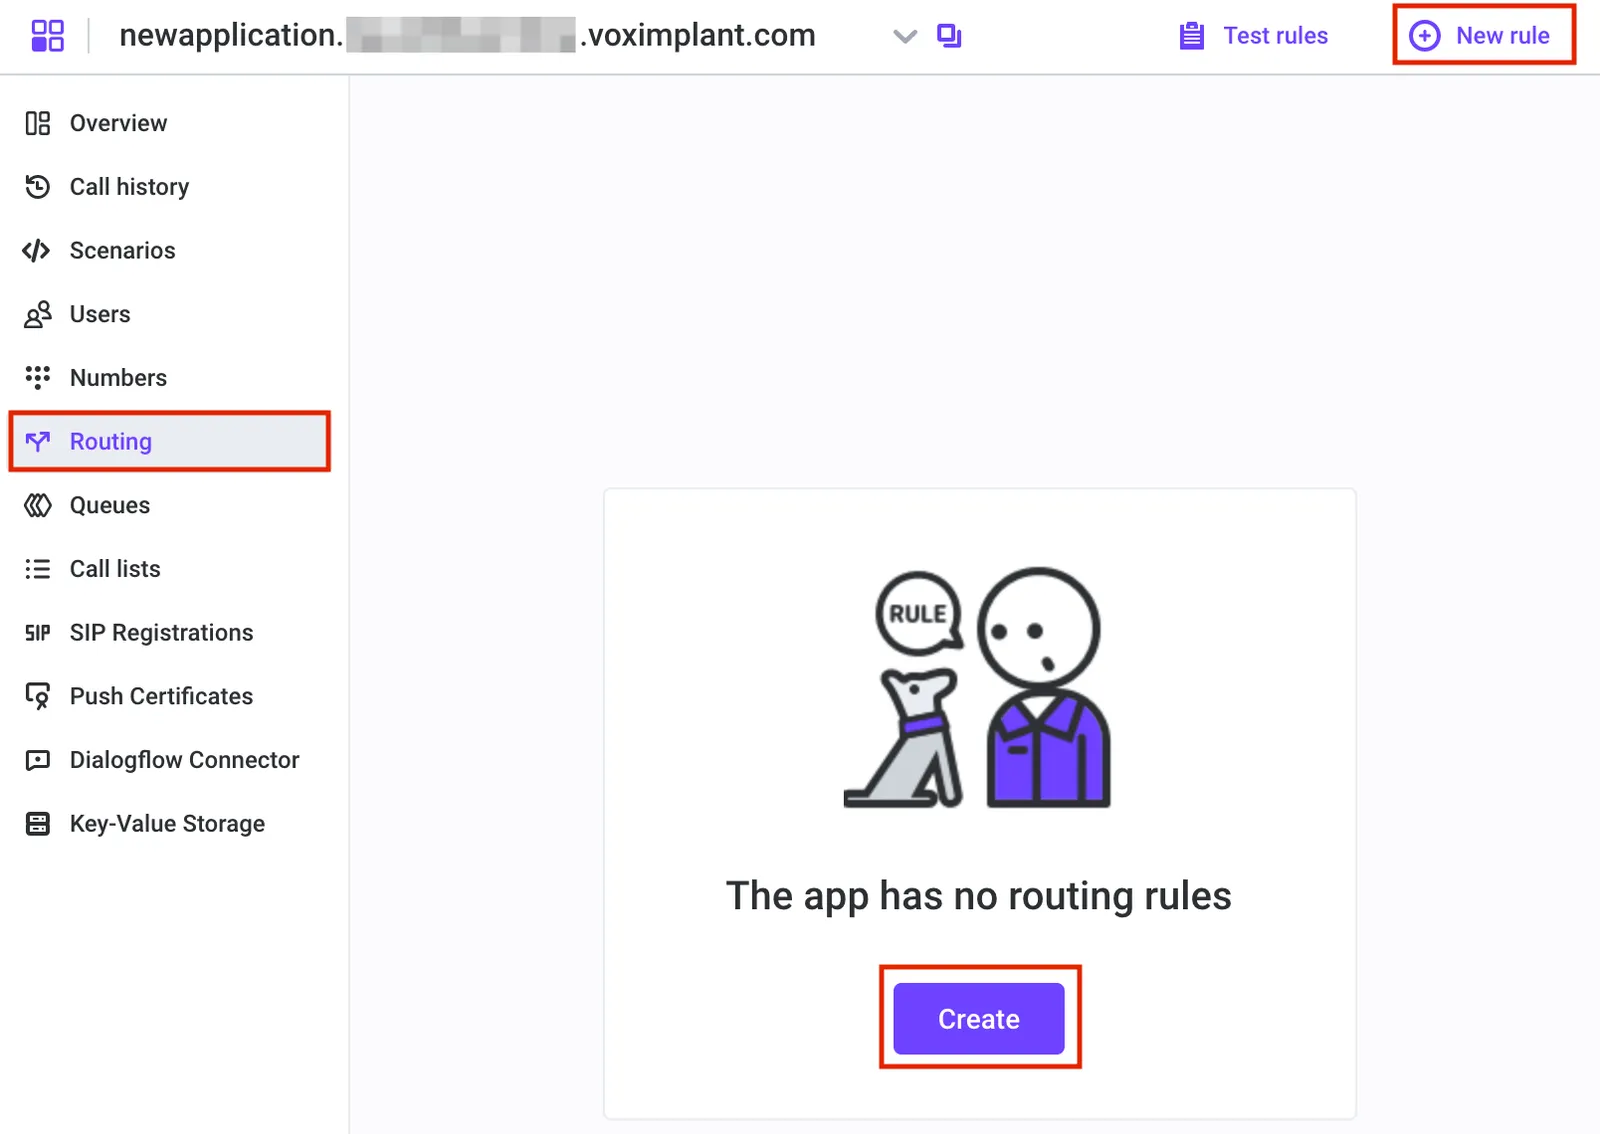
Click Create / New rule. The default mask .* is fine to process all inbound calls. Attach scenarios to a routing rule
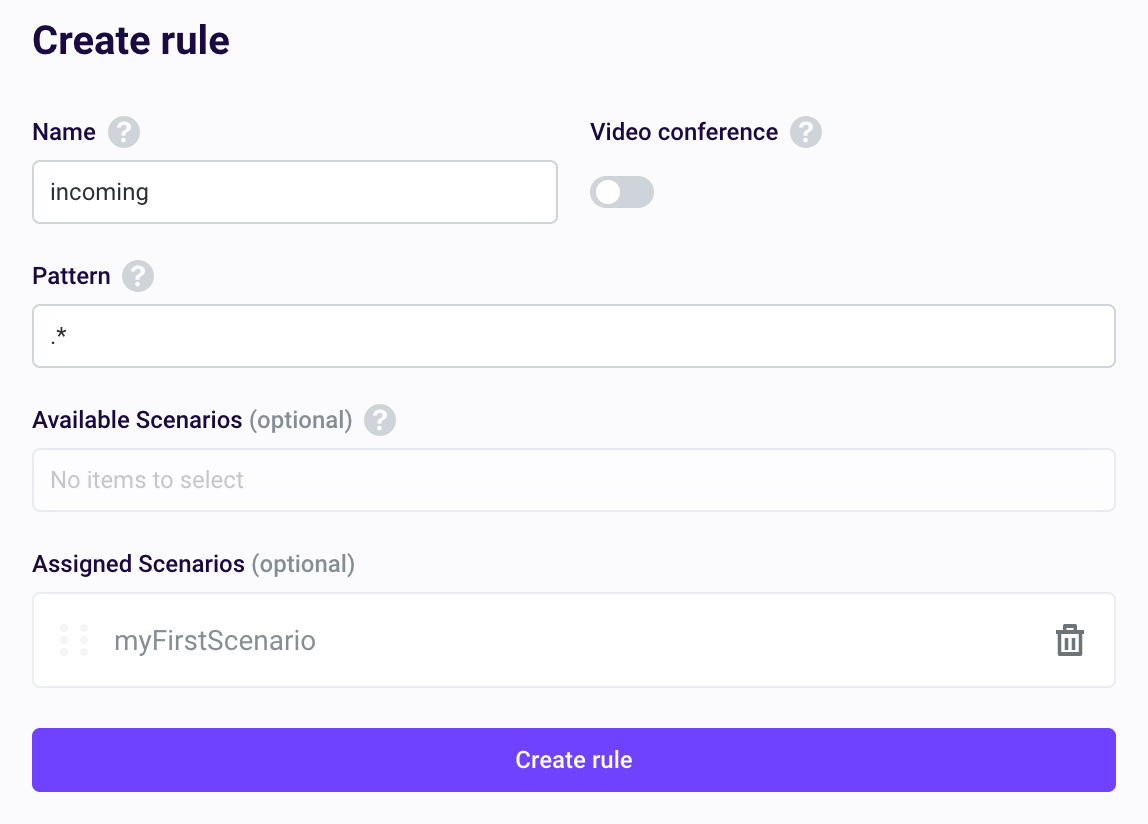
7

Attach the WhatsApp number to your Application

Select the available WhatsApp number and attach it to the current application.

8

Test inbound calling

Now you can place a call to your WhatsApp Business number and see it hit your VoxEngine scenario!

Outbound specifics

Outbound requires the same setup as inbound. Then you can use VoxEngine.callWhatsappUser() to initiate outbound calling to WhatsApp users from one of your WhatsApp business phone numbers from a scenario.

Outbound WhatsApp
const call = VoxEngine.callWhatsappUser({
number: "+15551234567",
callerid: "15557654321"
});

Outbound video walkthrough:

Video link: Outbound WhatsApp calling walkthrough

More information:

Multi-modal simultaneous voice & messaging support

The WhatsApp integration supports both calls and messages, so you can create multi-modal scenarios that handle voice and text in the same flow. For example, you can answer the call, send a welcome message, then continue with voice prompts and responses.

Architecture

This follows a similar setup procedure as above, but requires an additional server to proxy messages.
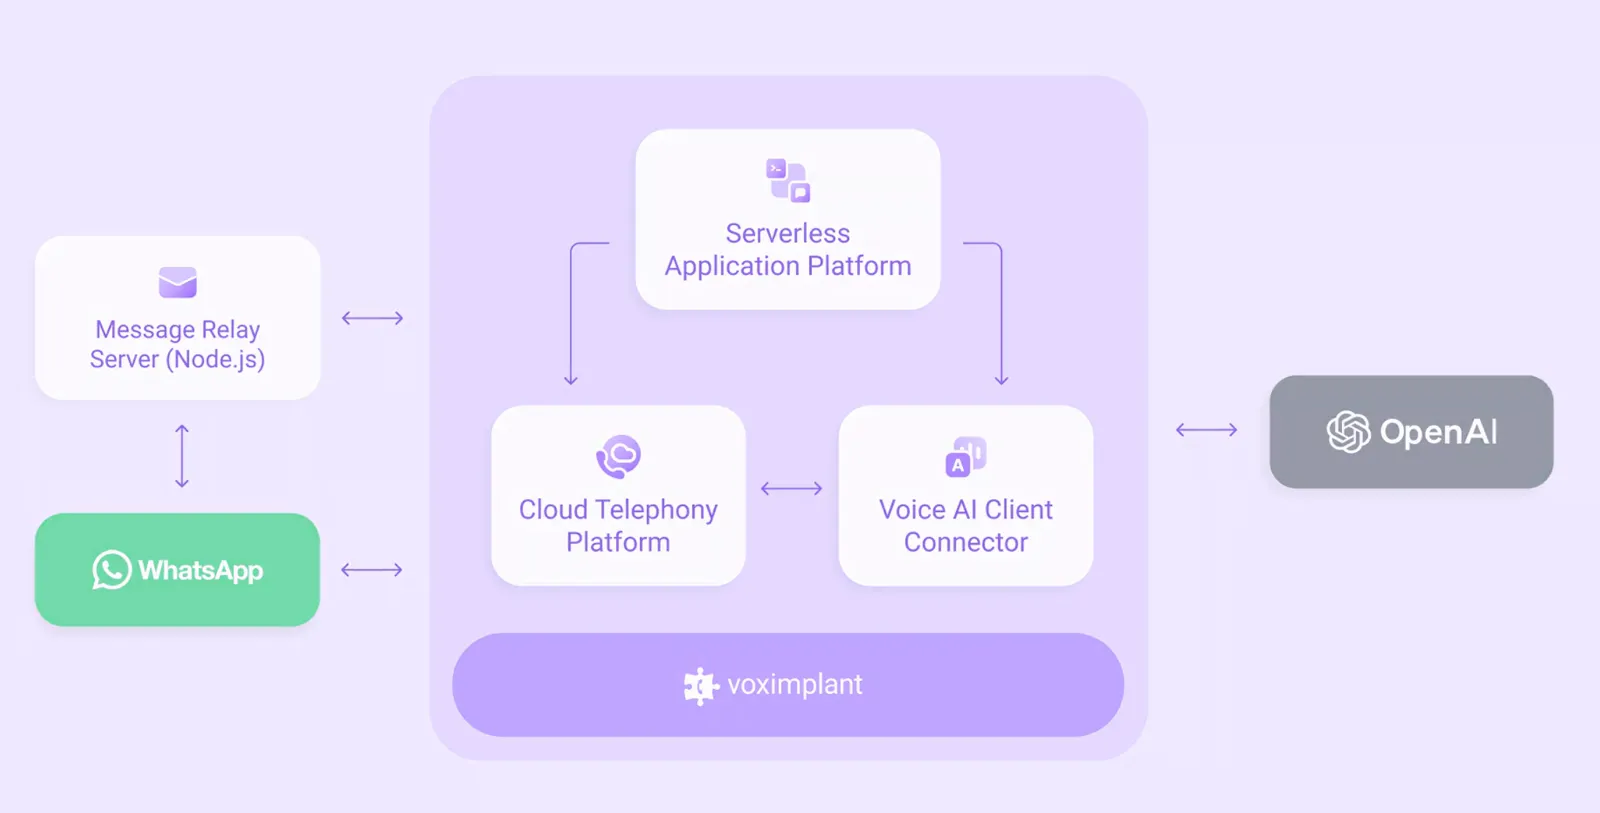
WhatsApp multi-modal architecture

Walkthrough and demo

See here for a quick walkthrough and demo of this capability: Video link: Inbound WhatsApp calling demo

Example code

VoxEngine code sample for the WhatsApp multi-modal voice + text flow using gpt-realtime-2.1:

voxengine_openai_ga.js
require(Modules.ApplicationStorage);
require(Modules.OpenAI);
let sessionUrl = null, connected = false, cid = null, realtimeAPIClient = undefined;
const OPENAI_API_KEY = VoxEngine.getSecretValue("OPENAI_API_KEY");
const MODEL = "gpt-realtime-2.1";
const WA_PROXY_URL = "https://waproxy.ngrok.app/webhook";
const onWebSocketClose = (event) => {
Logger.write("===ON_WEB_SOCKET_CLOSE==");
Logger.write(JSON.stringify(event));
VoxEngine.terminate();
};
VoxEngine.addEventListener(AppEvents.Started, (appEvent) => {
sessionUrl = appEvent.accessSecureURL;
});
VoxEngine.addEventListener(AppEvents.HttpRequest, (appEvent) => {
Logger.write("Inbound Http request");
try {
let data = JSON.parse(appEvent.content);
if (data.text?.body != undefined) {
const item = {
"item": {
"type": "message",
"role": "user",
"content": [
{
"type": "input_text",
"text": data.text.body,
},
],
},
};
// Client events are processed in order, so the item is in the
// conversation before the response is generated
realtimeAPIClient.conversationItemCreate(item);
realtimeAPIClient.responseCreate({});
}
} catch (err) {
Logger.write(JSON.stringify(err));
}
return "OK";
});
VoxEngine.addEventListener(AppEvents.CallAlerting, async ({callerid, call}) => {
cid = callerid;
const realtimeAPIClientParameters = {
model: MODEL,
apiKey: OPENAI_API_KEY,
type: OpenAI.RealtimeAPIClientType.REALTIME,
onWebSocketClose,
};
call.answer();
try {
realtimeAPIClient = await OpenAI.createRealtimeAPIClient(realtimeAPIClientParameters);
const session_update = {
"session": {
"type": "realtime",
"model": MODEL,
"instructions": `Your name is Voxy, you're a friendly and fun guy. You speak English only. You have to collect person's name, company he/she works at and his/her email. Call the 'createProfile' function whenever you learn all information including name, company and email address. You MUST NEVER mention the tools/functions to the user. You speak English ONLY, don't switch to any other language. Always continue the conversation after the user answers.`,
"audio": {
"input": {
"transcription": {
"model": "gpt-4o-transcribe",
"language": "en",
},
"turn_detection": {
"type": "semantic_vad",
"eagerness": "auto",
"interrupt_response": true,
},
},
"output": {
"voice": "cedar",
},
},
"tools": [
{
"type": "function",
"name": "createProfile",
"description": "Save contact information of a user for the purpose of creating/updating profile information.",
"parameters": {
"type": "object",
"properties": {
"name": {
"type": "string",
"description": "The user's name",
},
"emailAddress": {
"type": "string",
"description": "The user's work/business email address.",
},
"organization": {
"type": "string",
"description": "The name of the company/organization where the user works.",
},
},
"required": ["name", "organization", "emailAddress"],
},
},
],
"tool_choice": "auto",
},
};
realtimeAPIClient.sessionUpdate(session_update);
VoxEngine.sendMediaBetween(call, realtimeAPIClient);
connected = true;
const response = {};
realtimeAPIClient.responseCreate(response);
// Interruptions support: clear the media buffer in case of OpenAI's VAD detected speech input
realtimeAPIClient.addEventListener(OpenAI.RealtimeAPIEvents.InputAudioBufferSpeechStarted, () => {
Logger.write("===BARGE-IN: OpenAI.InputAudioBufferSpeechStarted===");
if (realtimeAPIClient) realtimeAPIClient.clearMediaBuffer();
});
realtimeAPIClient.addEventListener(OpenAI.RealtimeAPIEvents.ResponseDone, async (event) => {
// Logger.write("RESPONSE DONE");
// Logger.write(JSON.stringify(event));
// Check the function name and act accordingly
if (event.data.payload?.response?.output[0].type == "function_call" && event.data.payload?.response?.output[0].name == "createProfile") {
try {
let args = JSON.parse(event.data.payload.response.output[0].arguments);
if (args.name == "" || args.emailAddress == "" || args.organization == "") return;
Logger.write("Profile created, sending info to WhatsApp");
const obj = {
entry: [
{
changes: [
{
value: {
messages: [
{
from: cid,
type: "voiceai",
text: {
body: "Name: " + args.name + ", Email: " + args.emailAddress + ", Company: " + args.organization,
},
},
],
},
field: "messages",
},
],
},
],
};
Logger.write(JSON.stringify(obj));
await Net.httpRequestAsync(WA_PROXY_URL, {
method: "POST",
postData: JSON.stringify(obj),
enableSystemLog: true,
headers: [
"Content-Type: application/json",
],
});
const response = {};
realtimeAPIClient.responseCreate(response);
} catch (err) {
Logger.write(err);
}
// https://waproxy.ngrok.app/webhook
}
});
} catch (error) {
Logger.write("===SOMETHING_WENT_WRONG===");
Logger.write(error);
VoxEngine.terminate();
}
call.record({hd_audio: true, stereo: true});
try {
ApplicationStorage.put("WAB_" + callerid, sessionUrl, 60 * 90); // assuming that the call session wouldn't last longer than 1.5 hours
} catch (e) {
Logger.write("ApplicationStorage error: " + JSON.stringify(e));
}
call.addEventListener(CallEvents.Disconnected, () => {
if (realtimeAPIClient) realtimeAPIClient.close();
connected = false;
try {
ApplicationStorage.remove("WAB_" + callerid);
} catch (e) {
Logger.write("ApplicationStorage error: " + JSON.stringify(e));
}
VoxEngine.terminate();
});
});
VoxEngine.addEventListener(AppEvents.Terminating, () => {
if (connected) {
try {
ApplicationStorage.remove("WAB_" + cid);
} catch (e) {
Logger.write("ApplicationStorage error: " + JSON.stringify(e));
}
}
});

Node.js proxy server code: