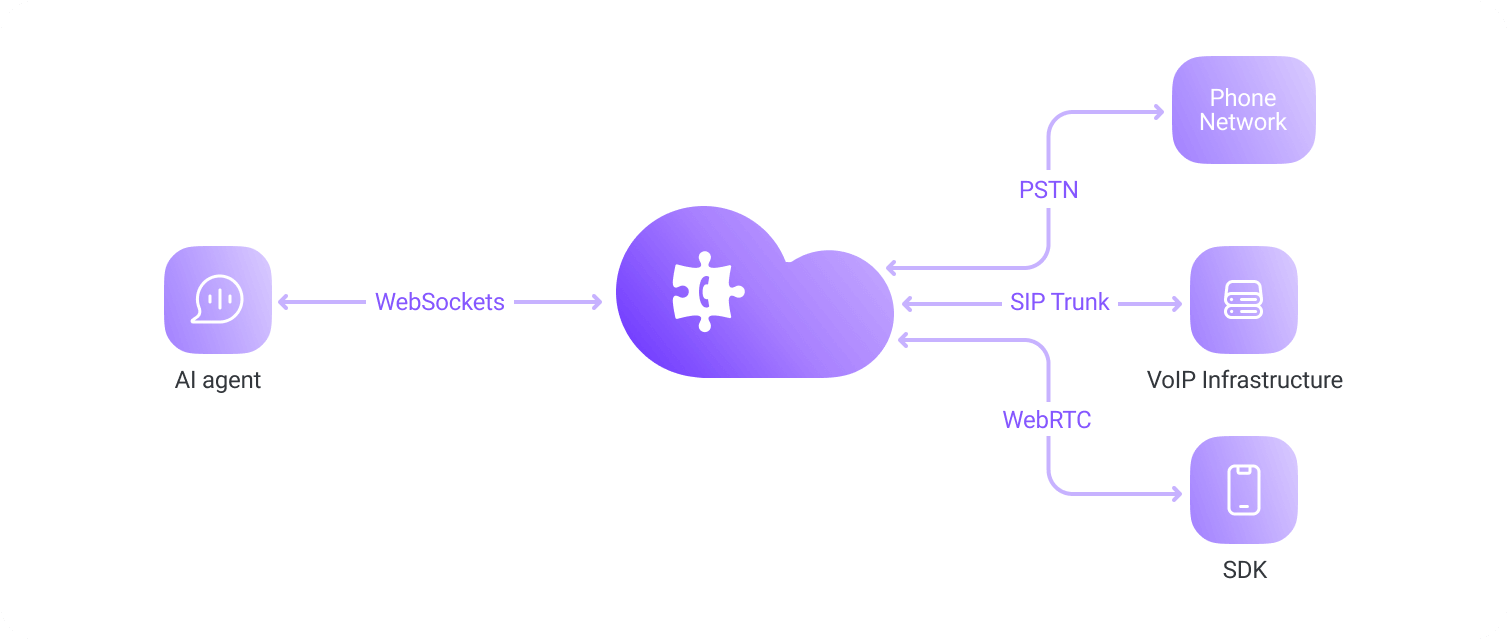
SIP
SIP and SIP Trunking overview
Use SIP when you need to connect PBX infrastructure, enterprise SBCs, cloud telephony providers, or existing SIP trunks.
SIP Trunking is the common production pattern for routing calls between your telephony core and Voximplant-managed Voice AI scenarios.
Voximplant supports SIP calling in three distinct models:
- SIP trunking based on number-based routing
- User-based SIP routing where you create a Voximplant user for each SIP endpoint and route based on username
- SIP registration where Voximplant registers on external SIP infrastructure and is treated like an extension
Handling SIP calls with external SIP Infrastructure
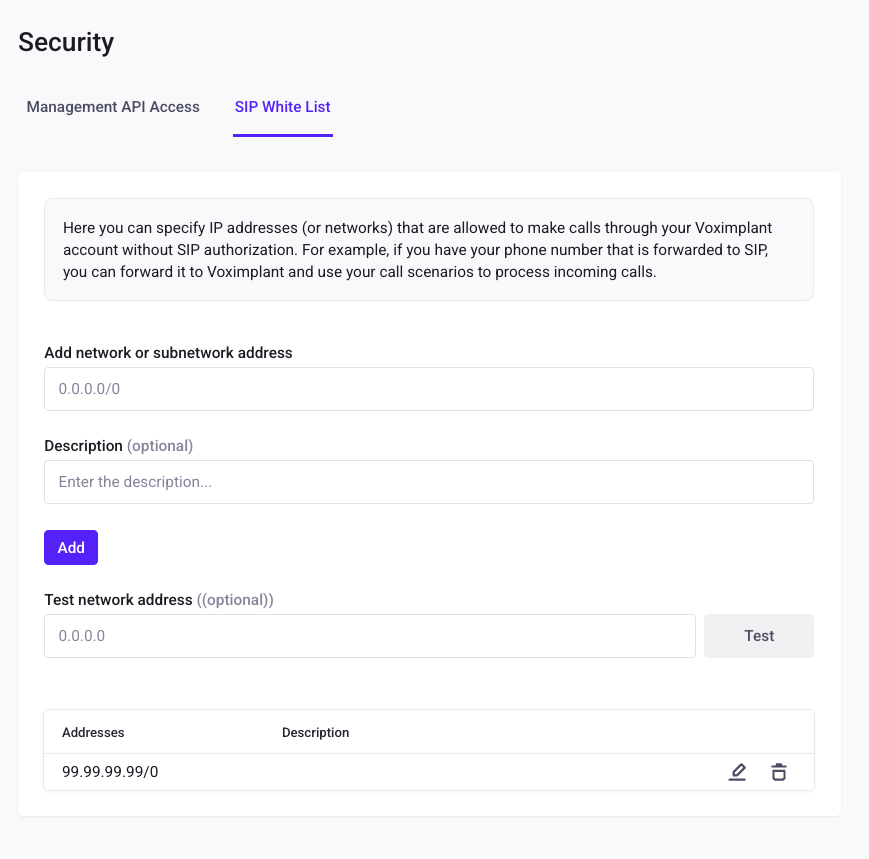
Security and allow-listing
If your SIP infrastructure uses a fixed public IP, add it to the SIP allow-list in Voximplant security settings. For firewall configuration, use the official Voximplant SIP/media IP sources below:
SIP trunking with number-based routing
Use this when your PBX/trunk forwards calls by dialed number.
Create routing rule for destination pattern
In your Voximplant application, create a routing rule whose pattern matches the inbound destination number format you expect - i.e. ^\\+1[2-9]\\d{9}$.
Attach Voice AI scenario to the rule
Attach your inbound Voice AI scenario to that rule. See Configure Voximplant - Create a scenario for details.
Forward SIP calls from PBX/trunk to Voximplant
Route calls to:
number@application.account.voximplant.com
where number matches the routing-rule pattern, application is your Voximplant application name, and account is your Voximplant account name.
Alternatively, you can also use this format app_id#account_id#destination@sip.voximplant.com where destination must be a number
and app_id and account_id are the numeric ids found in your application settings.
User-based SIP routing (Voximplant user per endpoint)
Use this when each SIP endpoint should authenticate as a distinct user and route by username or a pattern based on usernames.
Create one Voximplant user per SIP endpoint (agent seat, extension, or softphone identity).
Open Users in your application
In manage.voximplant.com, go to Applications, open your app, then open Users.
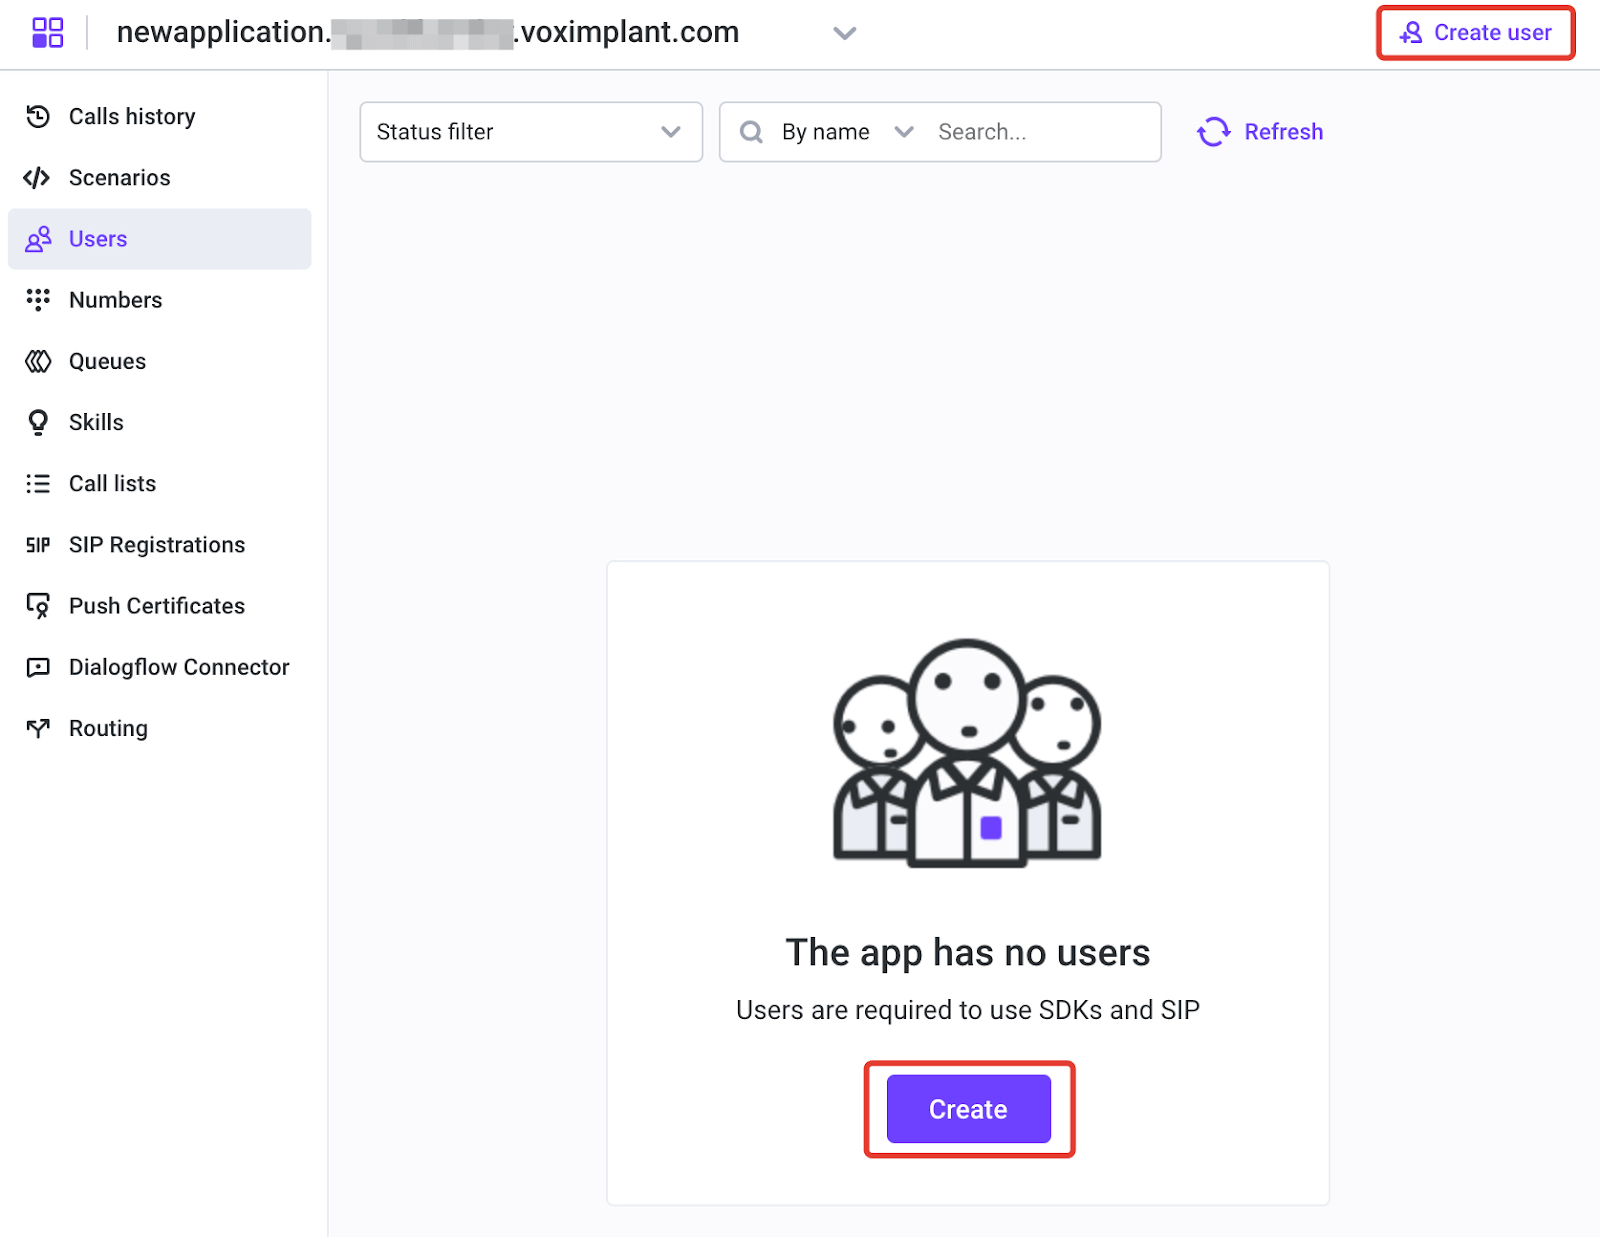
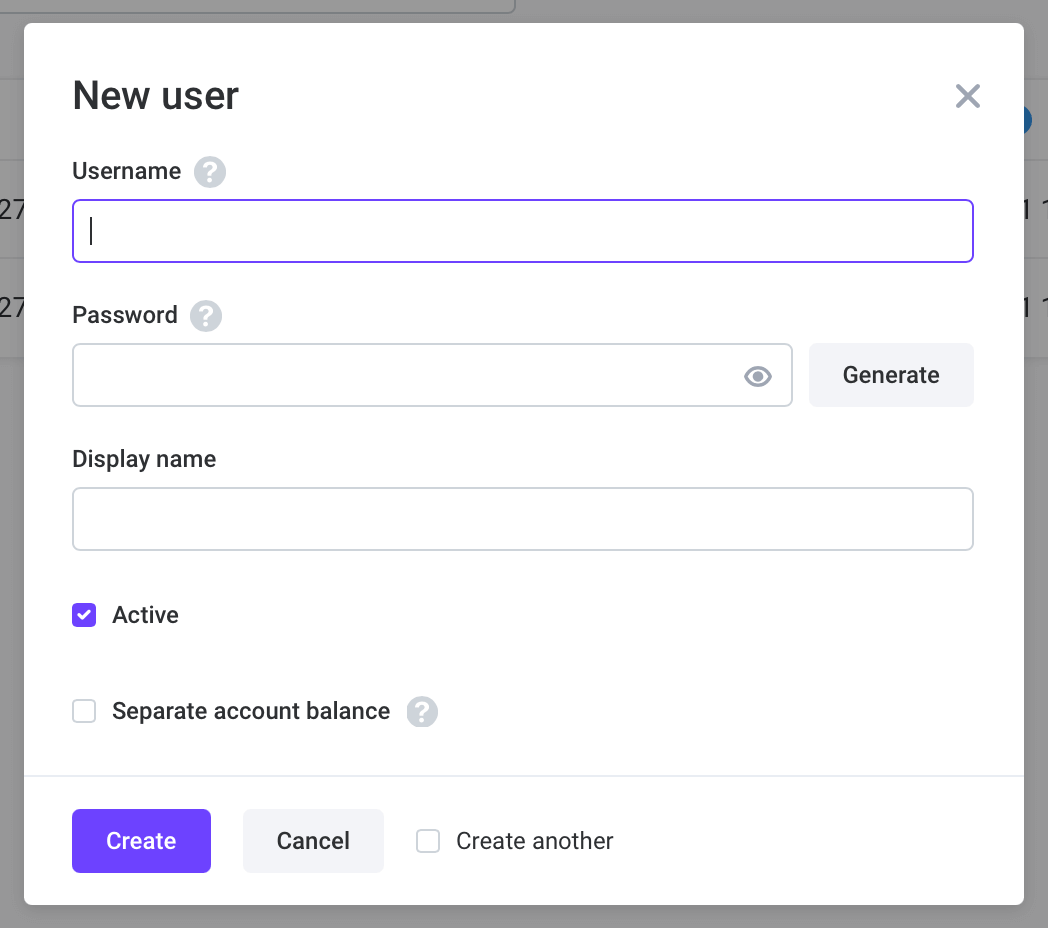
Create user credentials for each SIP endpoint
Create one user per endpoint (for example: support01, support02) and set a strong password.
Keep this username/password pair because SIP clients will use it for registration.
Create routing rule by username
Create routing rules that match the target username or alias and attach the relevant scenario. See Configure Voximplant - Create a scenario for details.
Login from your SIP software with these credentials
Login to this account on your SIP software using
user@application.account.voximplant.com
and the Voximplant user password.
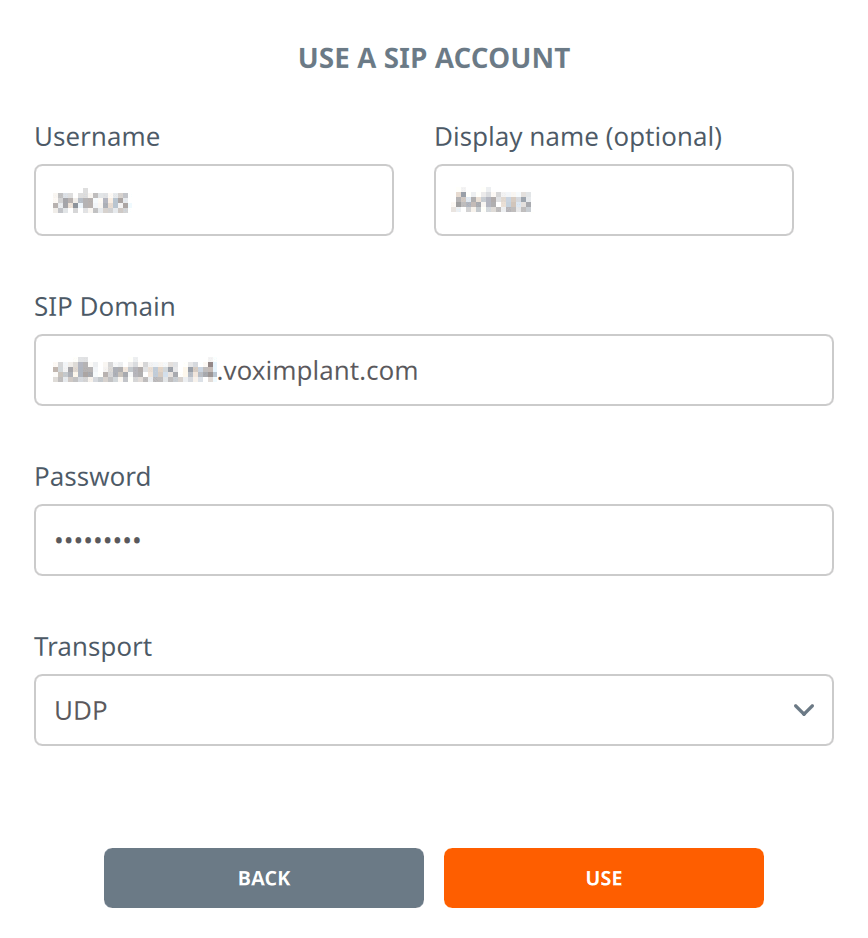 You can specify UDP/TCP transport, or specify TLS transport to secure your connection.
Some SIP infrastructure may require that you specify the password and options in the address:
You can specify UDP/TCP transport, or specify TLS transport to secure your connection.
Some SIP infrastructure may require that you specify the password and options in the address: sip:username:password@domain:5061;transport=tls
If you automate provisioning, you can also create users via the Management API: AddUser.
SIP registration (Voximplant as registered extension)
Use this when Voximplant should register to external SIP infrastructure (such as a PBX) and behave like a phone connected to that infrastructure.
Create extension/user in external SIP system
In your PBX or SIP provider, create the extension / ID Voximplant will use.
Create SIP registration in Voximplant
In Voximplant settings, create a SIP registration with that extension’s domain, username, and password.

Attach SIP registration to application
Attach the SIP registration to your application. This is available from the SIP Registrations tab in the left pane.
When you do this, you will need to select the desired routing rule that handles calls to this registration.
Note that you do not need to configure the rule pattern in this case — the rule works for all the calls to this SIP registration.
Check the registration status
Open SIP Registrations in Control Panel and verify the registration shows as connected/active before testing calls.
You should see s status of Success if the registration is active.
You can also verify status via Management API:
GetSipRegistrations.
Pricing note
Please note that you pay for SIP registrations monthly according to our price list. So if you create a SIP registration and delete it immediately, your account is charged for the SIP registration monthly fee.
When a SIP registration status changes from Successful to Failed and vice versa, you get an email notification to the contact email addresses and the HTTP callback invokes. You can learn more about HTTP callbacks in this article.
Placing outbound SIP calls from Voximplant
Use VoxEngine.callSIP() for outbound SIP dialing.
Check registration status
Before placing outbound calls through a SIP registration, confirm the registration is active in Control Panel (SIP Registrations) or via
GetSipRegistrations.
How to make calls with SIP registration
To place an outbound SIP call through a registration, pass regId in the third argument of VoxEngine.callSIP(...).
You can find regId in the SIP registration list in Control Panel, or in
GetSipRegistrations and
CreateSipRegistration responses.
Usually you only need to specify the destination username/number of the called party.
For programmable outbound launching, start the routing rule from GUI or call startScenarios and pass custom data (for example destination/caller ID) to the scenario.
SIP Voice AI connector example: