iOS: Push notifications
iOS: Push notifications
This article will help you to set up push notifications in iOS applications.
Voximplant push notifications for calls in iOS apps are based on a special type of Apple push notifications – VoIP push notifications.
The advantages of using VoIP push notifications for calls:
- The device is woken only when VoIP pushes occur, saving energy.
- Unlike standard push notifications, which the user should respond to before your app can perform an action, VoIP pushes go straight to your app for processing.
- VoIP pushes are considered high-priority notifications and are delivered without delay.
- VoIP pushes can include more data than what is provided with standard push notifications.
- Your app is automatically relaunched if it is not running when a VoIP push is received.
- Your app is given runtime to process a push, even if your app is operating in the background.
Limitations:
- VoIP push notifications are only available through the PushKit framework. If you have already integrated APNs push Notifications, you need to write additional code to support this type of push notifications.
- Since iOS 13, it is required to show an incoming call screen via CallKit, once a VoIP push is received. It is not possible to customize the incoming call screen. However, CallKit lets you integrate your calling services with other call-related apps on the system.
Configure your iOS project
Before you start
Before you implement push notifications for audio and video calls, you need to implement CallKit integration to your project. Follow this guide to learn more.
- Open the project in XCode.
- Switch to the Project Navigator and click on the project.
- Go to the Signing & Capabilities tab at the top panel. Check the Adding capabilities to your App Apple guide for more details.
- Enable Push Notifications and the following Background Modes: “Audio, AirPlay, and Picture in Picture”, “Voice over IP”, “Background fetch”, and “Remote notifications”.
Add certificates to the Voximplant Cloud
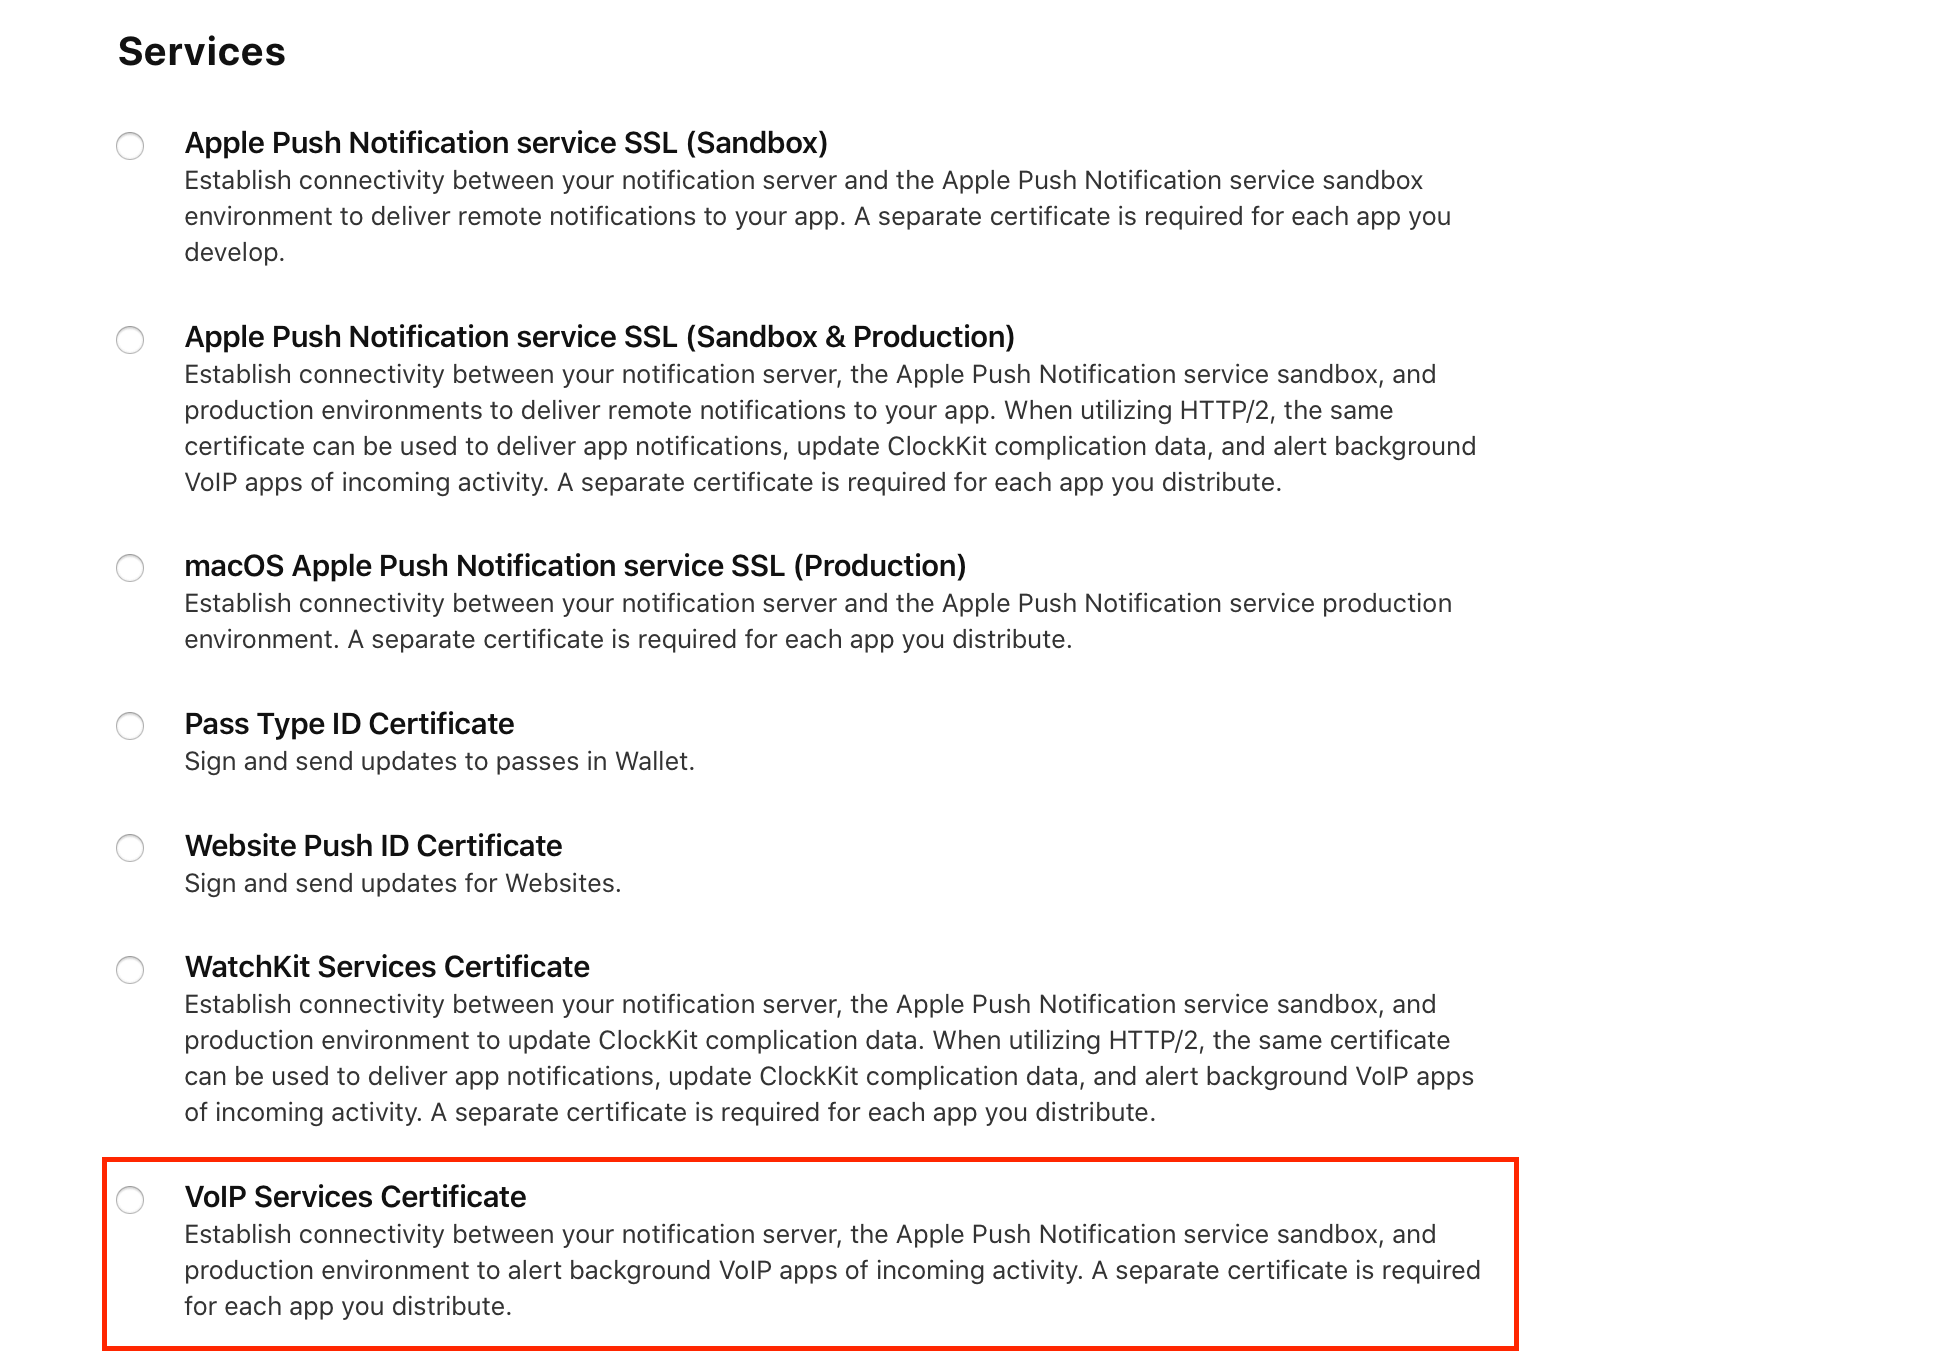
- Generate a VoIP Push Services certificate in your Apple developer account.
- Install the generated certificate to your Mac by double-clicking the downloaded file and importing it into the OSX Keychain of your Mac.
- In the Keychain interface (choose the Certificates tab), right-click on the imported certificate and export it as a .p12 file with a password.
- Log in to the Voximplant control panel.
- Go to your application, then switch to the Push Certificates tab.
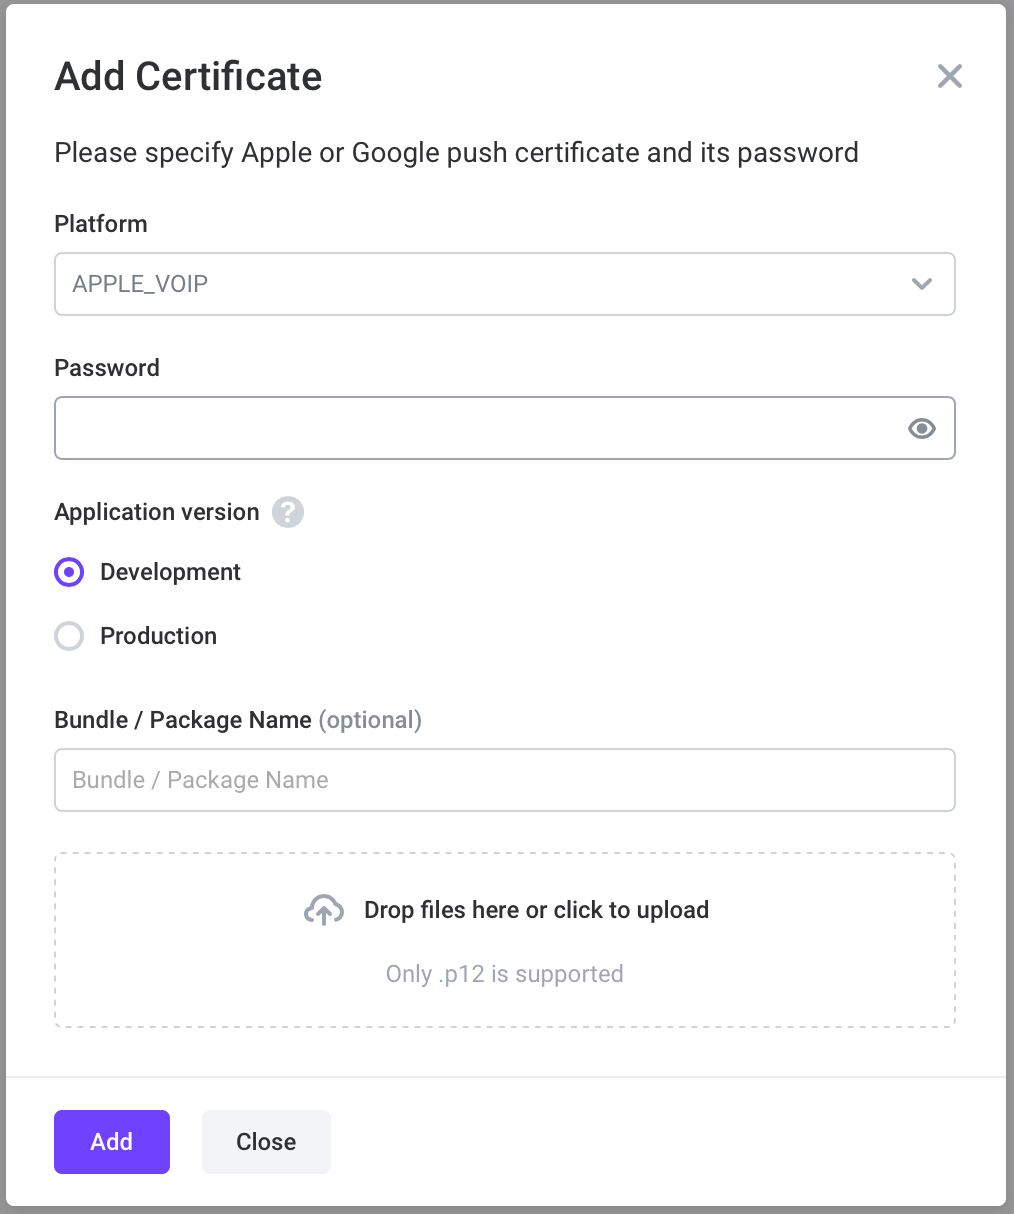
- Click on the Add Certificate in the upper right corner.
- In the Certificate for list, select APPLE VOIP.
- Click on Choose File and upload the .p12 file.
- Enter the password you have used while generating a file from your Keychain interface.
- Select Production or Development mode for the certificate.
- Click the Add button.
Production vs Development mode
Be careful while selecting the certificate mode as the push notification delivery depends on it.
Use Production mode only for the applications that are already released to the App Store or TestFlight. Use Development mode only with application builds locally on the developer’s machines for debug purposes.
The Voximplant Platform supports sending push notifications to several iOS applications with different package names within the same Voximplant application.
If it is required to add several APPLE certificates to the same Voximplant application, you have to set the application bundle name while adding the certificate.
Please note
If a bundle name is specified with a certificate, you should set the same bundle name when initializing the SDK.
Tip
The Voximplant Control Panel allows you to add only one certificate of one type. If you are developing an application and need to test push notifications in both Debug and Release modes, add the same APPLE VOIP certificate with your application bundle + specific suffixes, for example, “.dev”, “.prod”.
The Voximplant Cloud does not validate the bundle id, we use this parameter here only to identify the certificate needed to send a push notification. So, you don’t need to change the real bundle id, but only “mark” it for the Voximplant Cloud.
Do not forget to initialize the SDK correctly for Debug and Release configuration and set the suffix of the bundle id depending on the configuration.
Modify your VoxEngine scenario
To let the Voximplant cloud send push notifications to applications, the JavaScript scenario that initiates a call should include a push notification helper:
Provide a token to the Voximplant cloud
The Voximplant Cloud requires a device token to send a push notification for an incoming call. To get a VoIP push token, it is required to import the PushKit framework and subscribe to push token updates. We recommend that you do it when starting the application. Although there are no requirements to place the implementation of PushKit integration to the AppDelegate, it is better to initiate PKPushRegistry as soon as possible.
To get the push token for the first time, it is required to subscribe to the PKPushRegistryDelegate.pushRegistry(_:didUpdate:for:) method that is invoked when the system receives new credentials (including a push token) for the specified push type. If the push token is received earlier (for example, when the application was launched the previous time), this method is not invoked. However, you can get a locally cached push token from the PKPushRegistry.pushToken(for:) method.
Once the token is obtained from the PushKit framework, it is needed to register it in the Voximplant Cloud via VIClient.registerVoIPPushNotificationsToken(_:completion:) API. The API provides the completion block that informs you when the token is ready to use or when an error occurs. If an error occurs, check the error code for details.
VIClient.registerVoIPPushNotificationsToken(_:completion:) API may be called in any VIClient state (VIClientState), however, the token is registered only after the client logs in.
Register the token in these cases:
- Token has been updated by
<provider> - Another Voximplant user has logged in on the device
Handle push notifications
VoIP push notifications are received by the PKPushRegistry.(_:didReceiveIncomingPushWith:for:completion:) API of the PushKit framework.
Since iOS 13, Apple has the requirement to report any VoIP notifications to the CallKit framework by calling the CXProvider.reportNewIncomingCall(with:update:completion:) method. Reporting a call to CXProvider results in showing CallKit incoming call screen to the user. To show the call information such as the caller display name and the call type (audio or video call), parse the push payload to get all this information.
Instead of generating a random UUID for the CallKit, it is recommended that you use the NSUUID returned from the VIClient.handlePushNotification(_:) API. This UUID matches the VICall.callKitUUID of the VICall instance received later and allows you to manage the call.
It is important to execute the completion handler of the CXProvider.reportNewIncomingCall(with:update:completion:) method only after the call processing is completed:
- The call has been connected, i.e. VICallDelegate.call(_:didConnectWithHeaders:) is invoked
- The call was rejected by a user via the CallKit UI
- Any internal error occurs, for example, failure to establish the connection to the Voximplant Cloud, login issues, etc
If you execute the completion handler of the PKPushRegistryDelegate API before the call processing is complete, the system may reduce the application resources which can affect the ability to establish a call successfully.
Pay attention
On iOS 13.0+, if you fail to report a call to CallKit, the system terminates your app. Repeatedly failing to report calls may cause the system to stop delivering VoIP push notifications to your app.
VIClient.handlePushNotification(_:) API can be called in any VIClientState, but to receive a VICall instance of an incoming call, it is required to connect to the Voximplant Cloud and log in. After you do that, the VICallManagerDelegate.client(_:didReceiveIncomingCall:withIncomingVideo:headers:) method is invoked to provide access to the VICall object.
Push notifications are sent automatically! Use the callUser method in the VoxEngine scenario and a push notification is automatically sent to the app. Thus, the app can wake up, connect to Voximplant, log in, and accept the call.
Use tokens or keys for better security
Voximplant supports 3 ways of the authorization from SDK:
- With a username and a password
- With a username and a token
- With a one-time login key
Saving the password is not secure, so we would recommend that you use the “token” or “key” approach.
The token is received from an event after a successful login and can be saved and used later instead of the password.
One-time key
The “login key” approach allows you to completely avoid the use of a password on the client side by offloading it to your backend.