For AI agents: a documentation index is available at the root level at /llms.txt and /llms-full.txt. Append /llms.txt to any URL for a page-level index, or .md for the markdown version of any page.
Platform docsVideosCommunitySign up
CapabilitiesGetting startedVoice AI OrchestrationVoxEngine PlatformAPI ReferenceFAQ
  • VoxEngine Development
    • VoxEngine concepts
    • Applications
    • Users
    • Scenarios
    • Routing rules
    • Phone numbers
    • Calls and sessions
    • Video calls
    • Management API
    • Account subusers
    • Integrations
    • Firewall
    • Cloud IDE
    • Type declarations
    • VoxEngine CI
    • Working with API requests
    • Working with the Voximplant's API
    • Remote session management
    • Key-value storage
    • Secret storage
    • Custom data
    • Limits and restrictions
    • Scenarios troubleshooting
    • How billing works
  • Management API
    • Overview
    • Developer Basics
    • Authorization
    • Callbacks
    • Child accounts
    • Accessing secure objects
  • Web and Mobile SDKs
    • iOS: CallKit
    • Android: ConnectionService
    • Screen sharing
    • Custom video sources
    • Mobile SDK statistics
LogoLogo
Platform docsVideosCommunitySign up
VoxEngine Development

Users

Create users for SDK auth, SIP clients, and application calling
||View as Markdown|
Was this page helpful?
Edit this page
Previous

Applications

Next

Scenarios

Built with

On this page
  • How to create a user
  • Frequently asked questions

Voximplant users are essential for authorizing your web or mobile SDK applications, SIP clients, to make and receive calls, and use messaging functionality.

How to create a user

You can create a user through the Voximplant control panel or by executing the AddUser management API method.

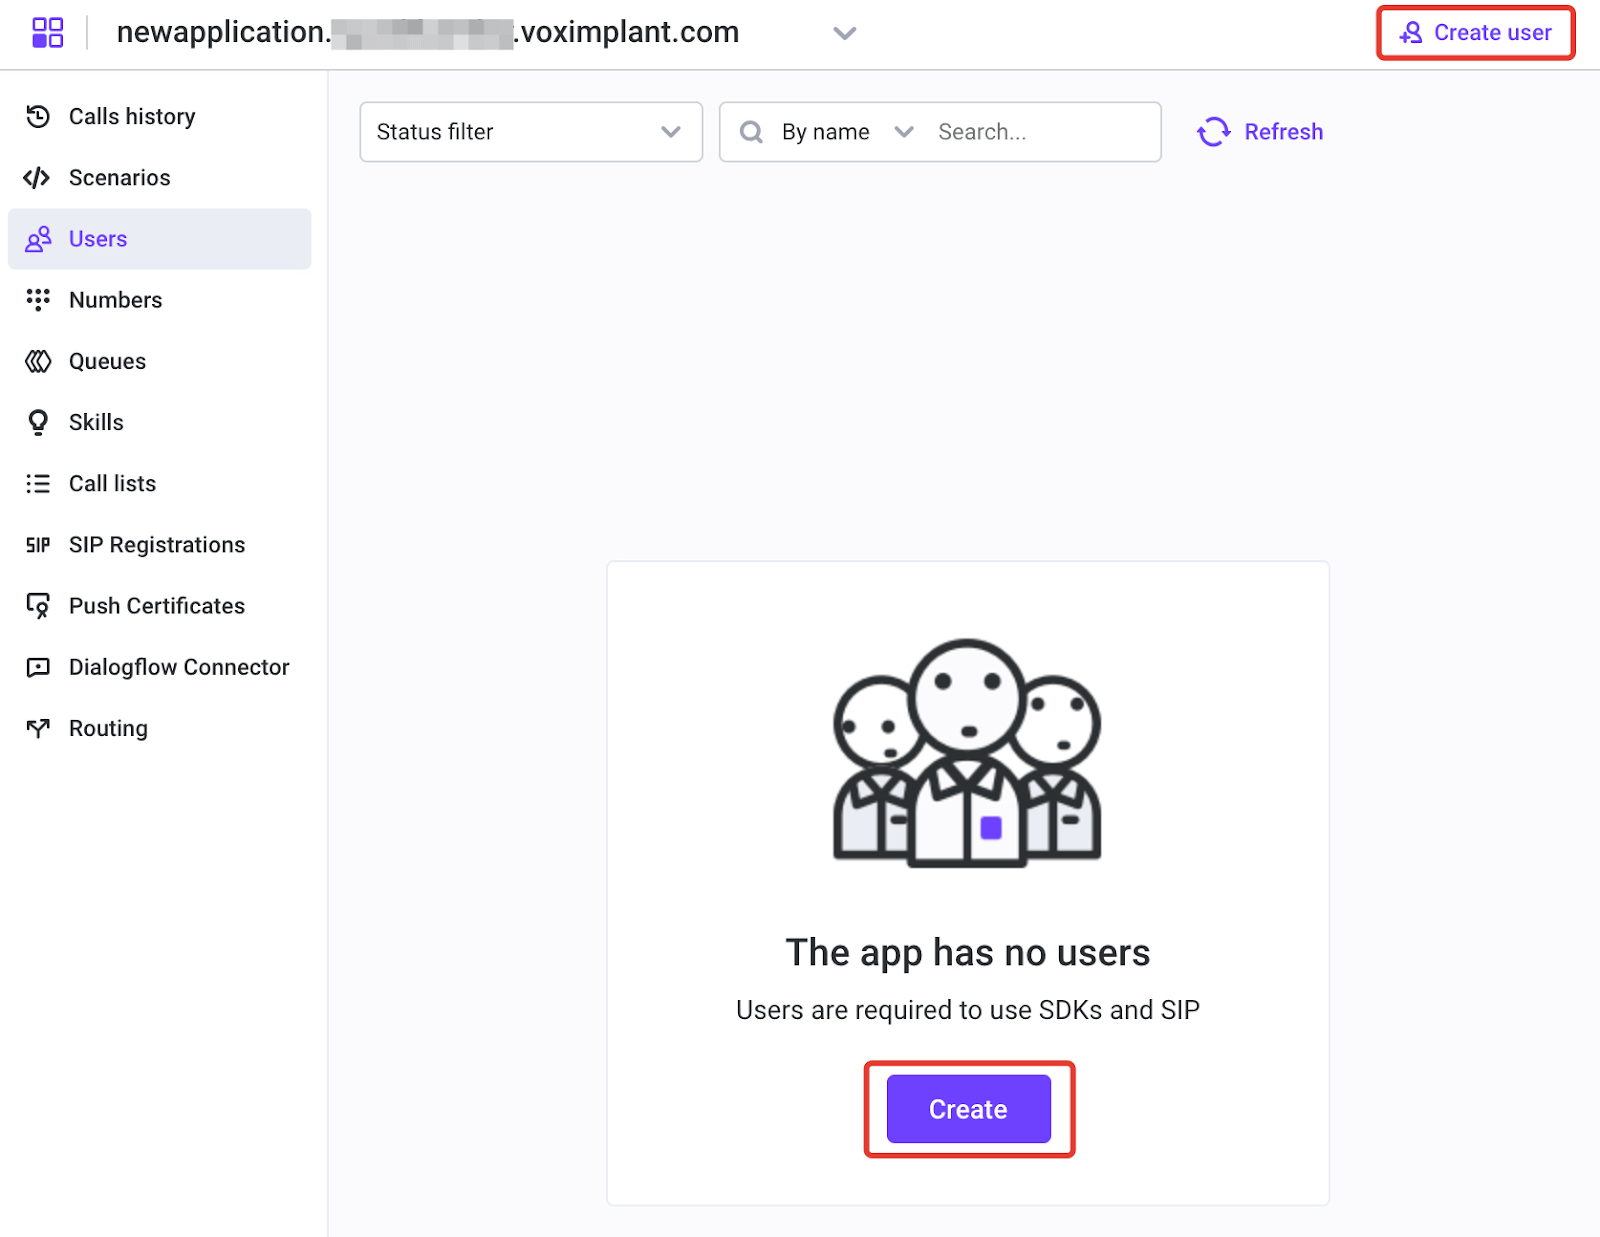
To create a user in the control panel, navigate to the Applications section and select the appropriate application. Then, move to the Users section and click the Create a user button in the upper right corner (or in the middle of the screen if your app does not have any users):

Create a user

This opens a New user editor:

New user editor

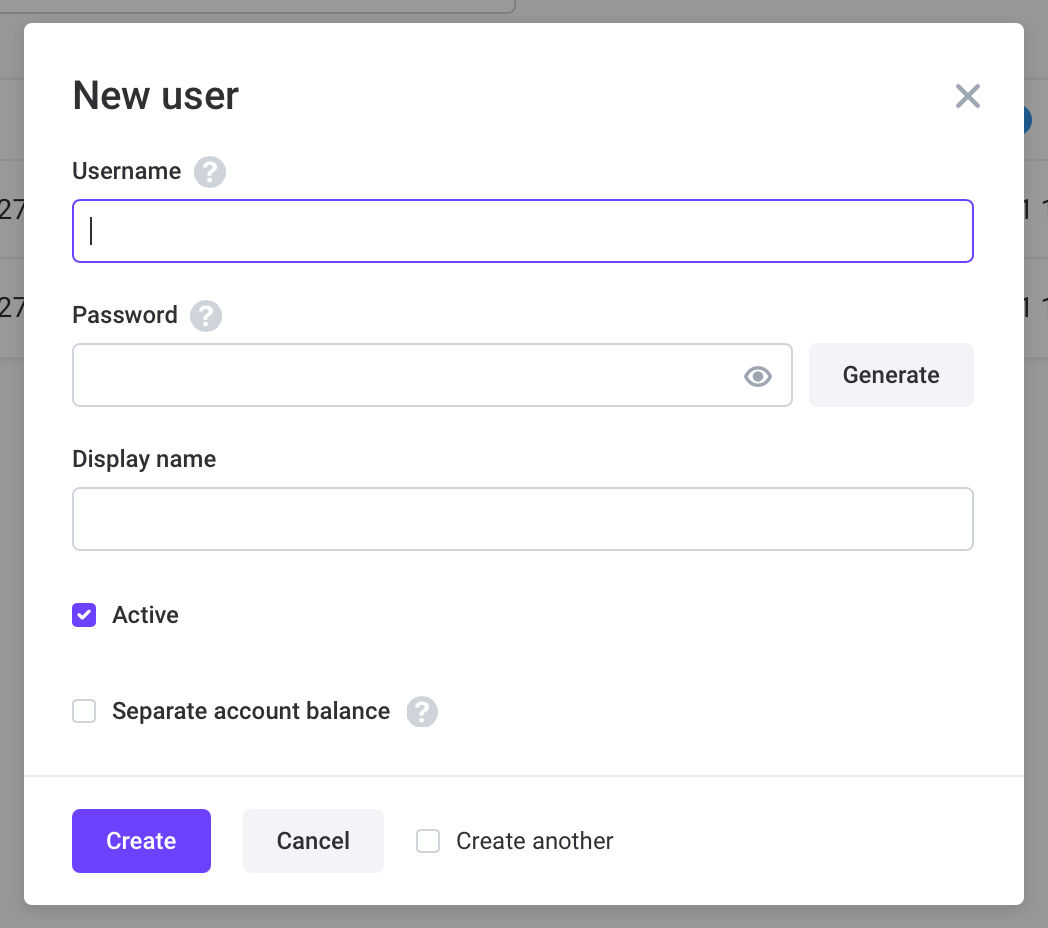
In this editor, specify the username, password, and display name for your new user. Click Create to save the changes. If you intend to create multiple users, check the Create another checkbox, which will open a new editor for each user.

Note

You can disable the active checkbox to make a user inactive. Inactive users cannot log in to the application.

Note

You can set up a user to have a separate balance account to manage expenses.

Frequently asked questions

I need to create an application for a customer with a separate account balance. How can I do it?

You can create a new application and a user with a separate account balance within this application. If you want to give this customer full access to the application, you can create a child account for this customer.